

Google considers blog load speed when ranking blog in the search results.
This means that you need to keep an eye on your blog’s loading speed to ensure you aren’t being held back. User experience is also affected by a page with a slow loading time. This is due to the fact that users place more importance on a fast blog than a slower one.
Results from a survey carried out by Akamai and Gomez.com says that 50% of web users expect a site to load in two seconds or less and they tend to abandon a site that does load in more than three seconds.
Also, 79% of online shoppers who experience problems with the performance of websites confessed that they would not be return shoppers.
4 Ways to Optimize Your Blog to Load Faster
1. Cache
Since many aspects of your blog don’t change very often (such as certain design elements, your logo, JavaScript resources, and so on) it makes sense to cache them instead of making a new request each time a page is loaded.
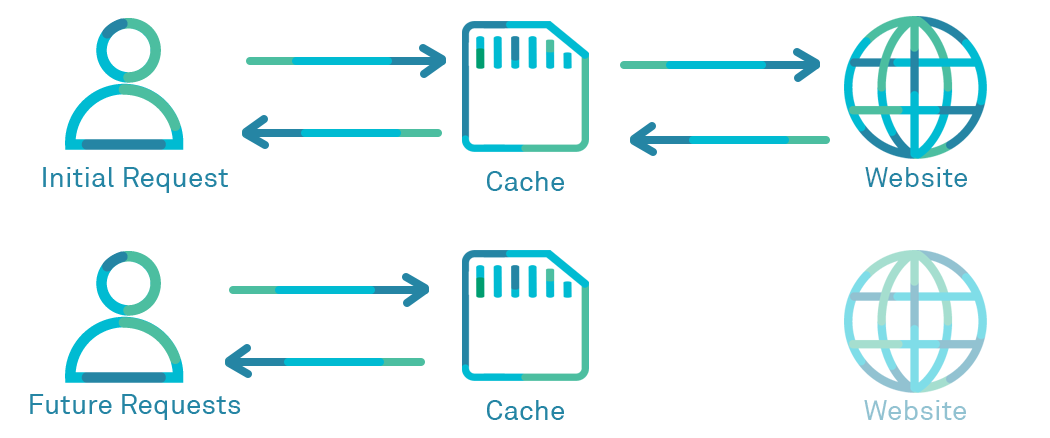
Having cached the file, copies can be utilized, eliminating the need for the file to be requested. Reducing the amount of requests minimizes the info that needs to be transferred to a browser.
The easiest way to do this is using a caching plugin W3 Total Cache. There’s actually to good caching plugins to consider for WordPress.
W3 Total Cache is a great solution for larger, more complex websites and if you want to have a lot more control over the optimization of your website.
The other plugin is WP Super Cache and this is great for smaller websites and for anyone that just wants a simple click-button solution to speed up their website.
2. Minify HTML, CSS and Javascript
Your goal is to eliminate all the extra space in your source code. When developers write code, they use a lot of spaces and tabs to make the code readable for other programmers or themselves.
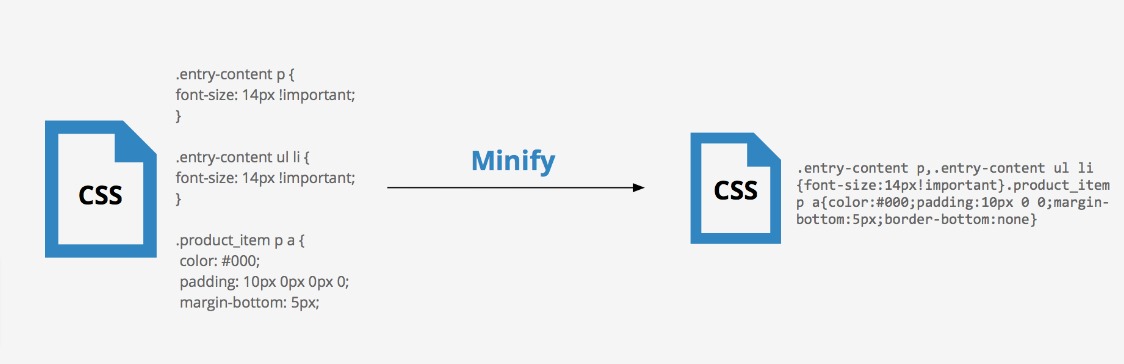
Servers and browsers don’t care about white space between code clusters – they just read the code and execute each instruction.
When you eliminate that white space between code clusters, you reduce the number of The browsers and servers have to read speed up your blog’s load time.
You can use a single plugin called WP-Minify but we don’t recommend that as we‘ll have minification done by W3 Total Cache (Read on for W3 Total Cache and WP Super Cache complete setup instructions).
3. Minimize HTTP Requests
When someone visits your blog , they are making a request for a web page. Every component of that web page results in a request itself.
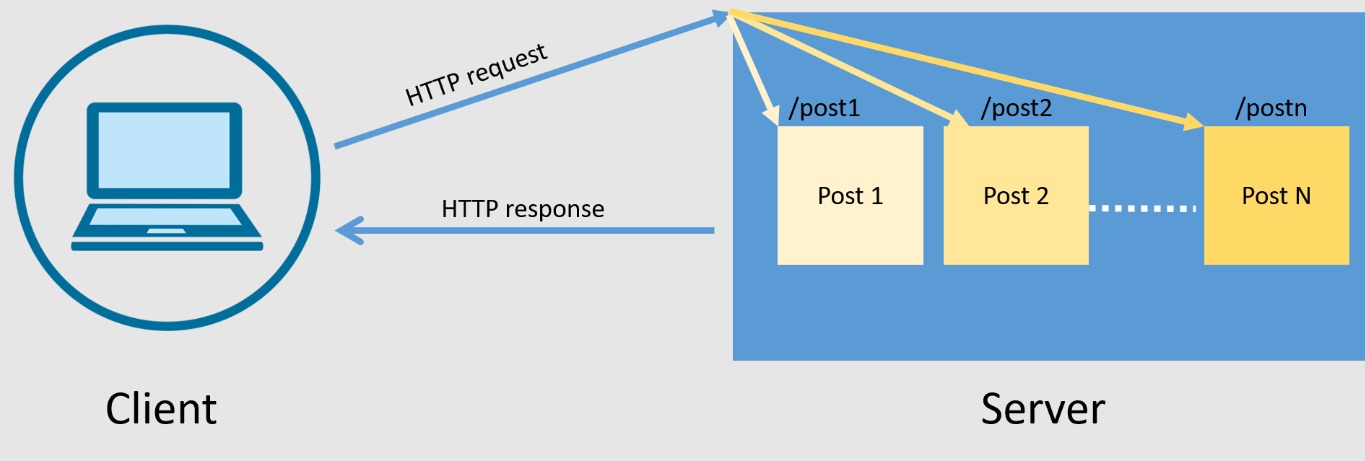
Most websites have JavaScript files, style sheet files, images and other components. Each of these results in a request and browsers take time to do each one.
The more files you have (including things like WordPress plugins, unnecessary scripts or outdated temporary files), the longer your site will take to load.
Your goal is to reduce the number of files required to display your blog. Get rid of everything that isn’t necessary to your site’s operation.
If you have deactivated plugins still stored on your site or scripts installed that you aren’t using anymore, remove them, so they don’t slow down your blog load time.
Also, If a website isn’t coded properly, there will be hiccups in the way pages are displayed and again, a long loading time will be the result.
4. Image Resizing and Optimization
You goal here will be to resize the pictures you display on your blog. You’ll want to make them as small as possible and also ensure that the resizing is not done by the browser.
Many picture files come with a lot of unnecessary metadata that can significantly increase the size of a picture file on your blog. Make sure to compress the images on your site so they’re at the smallest file size possible.
Many designers and webmasters make the mistake of uploading images to their sites with file sizes much larger than they need to be. High-definition cameras can take photos that are 10MB – an image that size on your website will harm your load times.
Remember to resize and compress your images before they’re uploaded to your blog so that your visitors’ browsers don’t have to go through this extra step (if the browser resizes the images that means slow site loading).
Use plugins like EWWW Image Optimizer.or Optimus to resize your images to the correct size. Once the image is the proper size, compress the file and upload the image on your blog.
If you have a very image-intensive blog , you might consider “lazy loading” your images. Lazy loading refers to loading your images after other content has loaded first.
This makes it appear that your blog is loading faster since users will see content and structure right away, instead of waiting for images to load first.
Using Cloudflare to Speed up Your Blog
Cloudflare was originally created to protect websites against spam and malware. In the process of doing this, CloudFlare discovered that it not only protected websites but resulted in improved blog speed and performance as well.

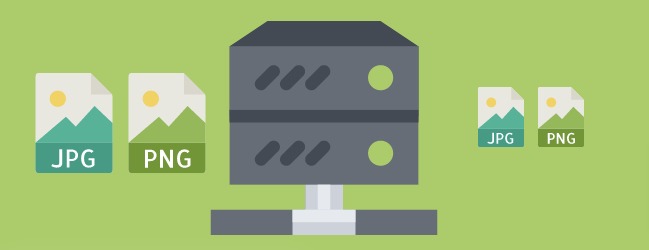
The process by which CloudFlare protected was similar to content delivery network (CDN) that made blogs load faster. CloudFlare offers free and paid services.
For most websites, the free plan is more than enough Using CloudFlare will not only improve your page load times, it will also protect and secure your website against spam and malware.
Setting up and Configuring CloudFlare
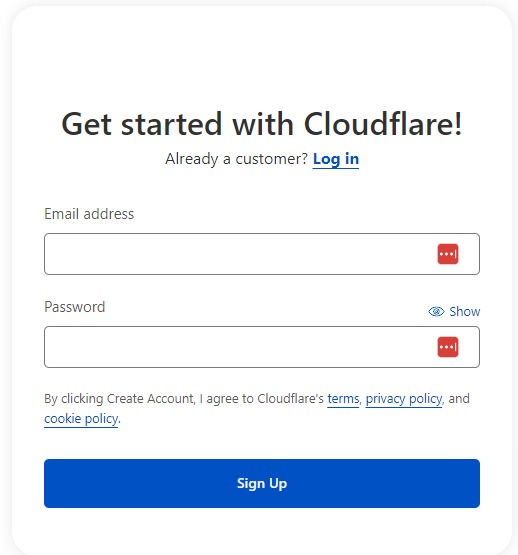
First, an account must be created on the Cloudflare website. Use an e-mail address, user name and password in order to register with them.
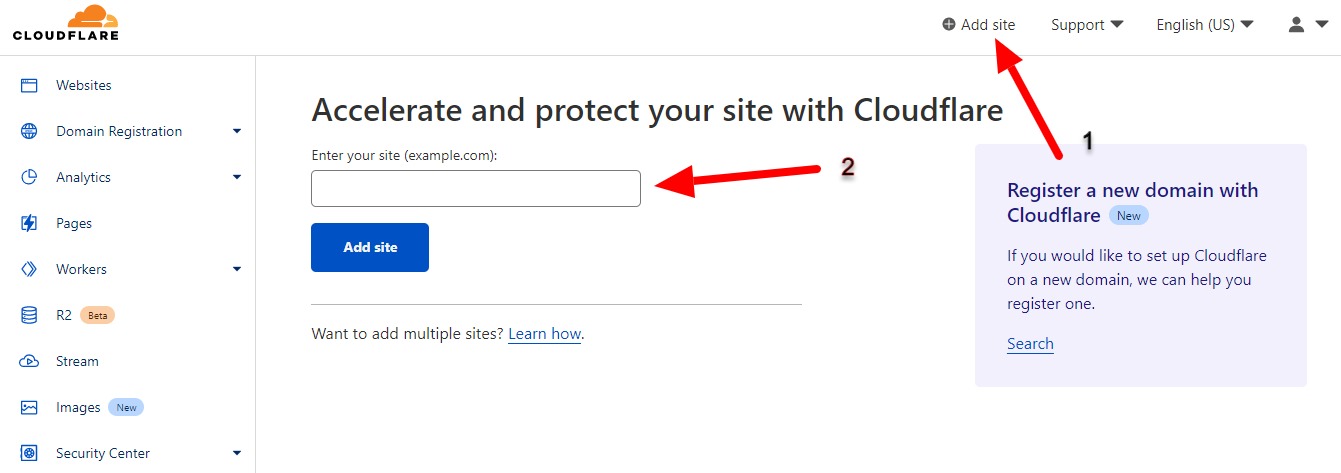
On the next page, enter your full website address (example http://www.example.com).
Next you will be shown a video, during which CloudFlare runs a check of your website. Watching it is recommended. Afterwards, click on “Continue”.
Next, you will be asked to confirm the DNS records CloudFlare found for your website. Usually, the records that CloudFlare finds are correct.
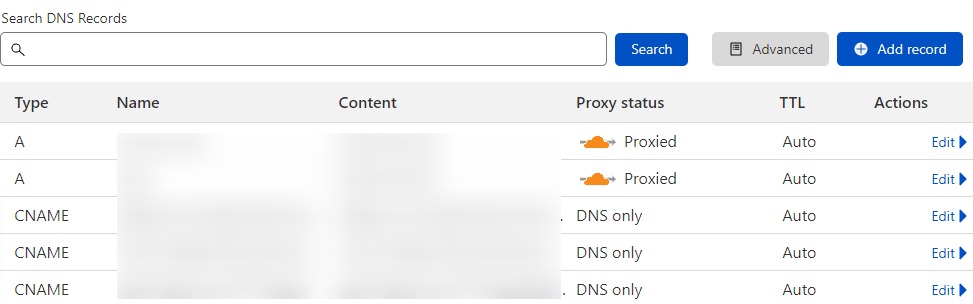
Essentially, you want to ensure that you see your domain name with an “A” in front and “www” with a “CNAME” in front.
Both should have orange clouds to the right. The other records should have a gray cloud or no cloud. On the next step you choose your initial settings.
The free plan is usually more than enough for most websites. Choosing “CDN + basic optimization (faster)” is a good thing to start with and you can change it at any time.
Lastly, choosing the security level Medium is absolutely sufficient and a good choice. As the last step of the set up process, you are required to log in to your domain name provider or hosting provider to change your DNS records.
You usually do this at the same place you registered your domain name (GoDaddy for example).
Each company is slightly different, but you should be able to look in your administration area for “DNS” or “Nameservers” and make the change there.
Your domain register or hosting company should have help files or support that can assist you easily.
Once you have changed your DNS records to point to CloudFlare, it can take up to 24 hours for the changes to take effect (though it often happens in a few hours).
CloudFlare has a good knowdlege base and good email support. If you run into any issues, they will be able to help you out. You will be able to control your account by clicking Websites from the top menu and then selecting the settings you want to adjust.
As far as analytics are concerned, CloudFlare offers reliable information. Your website traffic is running directly through their servers (unlike Google Analytics, which relies on JavaScript) so their reports are accurate. I still recommend using Google Analytics or another analytics program while using CloudFlare as well.
That way, you receive two laywers of analytics information.
If you are using W3 Total Cache, you can integrate CloudFlare directly with the plugin. Go to Performance > General Settings and scroll down to the CloudFlare section.
Make sure Enable is checked. Add your CloudFlare account information, making sure “Development mode” is set to “Off” and then click the Save all settings button.

Check more interesting Articles:
Why WordPress Site Page Speed Important ?
5 Proven Ways To Increase Website Traffic
How To Increase Traffic To Your Blog : Beginner’s Guide
Consider Following a Course ?
With Lifetime Access ?
We have been the number 1# platform for delivering most demanding course. Becoming Lifetime Member , You will receive all the Premium content For FREE
")
Consider Following a Course ? With Lifetime Access ?
We have been the number 1# platform for delivering most demanding course. Becoming Lifetime Member , You will receive all the Premium content For FREE