
")
Aside from the actual earnings of your website and the profit that’s based upon, there are additional “method” your site can have that can make it even more money, things like –
- Newsletter
- Social Profiles
- Pixel Data
And so on..
Even if you’re earning truckloads of revenue from your site, don’t rest on your laurels just yet. Since you’ve focused on how to optimize your site for organic search thus far, you haven’t looked at other opportunities for your site to profit even more!
That’s what we’ll talk about in this section. Below are some of the best way to Increase Website Traffic you can create to help increase your site’s earnings potential:
1. Email List
The beauty in an email list is that subscribers know you and believe in what you do.
The fact that they signed up to your list means that they want to know more about what you have to say.
As a result, you remove the obstacle that exists between you and subscribers. You can send emails straight to their inbox and they’ll read them like the true fans they are.
And for the same reason, you can sell more effectively via email than any other method. Since trust towards your brand exists among your subscribers, they’ll be much more willing to spend money on whatever it is you’re offering.
-
Setting up your email list
To get you started, you need to decide on which email marketing platform you must use for keeping subscribers and sending emails to them.
Highly recommend Mailerlite to set this up. It is free to use for 1,000 subscribers and below. Once you exceed the subscriber count, you’ll have to pay up.
You can create forms and embed them on any section of your website. They also have a landing page building where you can set up a dedicated page to collect subscribers.
Mailerlite has better automation features than MailChimp. You can set up drip campaigns for selling products and be done with them. All you must do now is monitor their progress and make changes to improve their performances.
That said, let’s log in to Mailerlite now and create a form there.
.
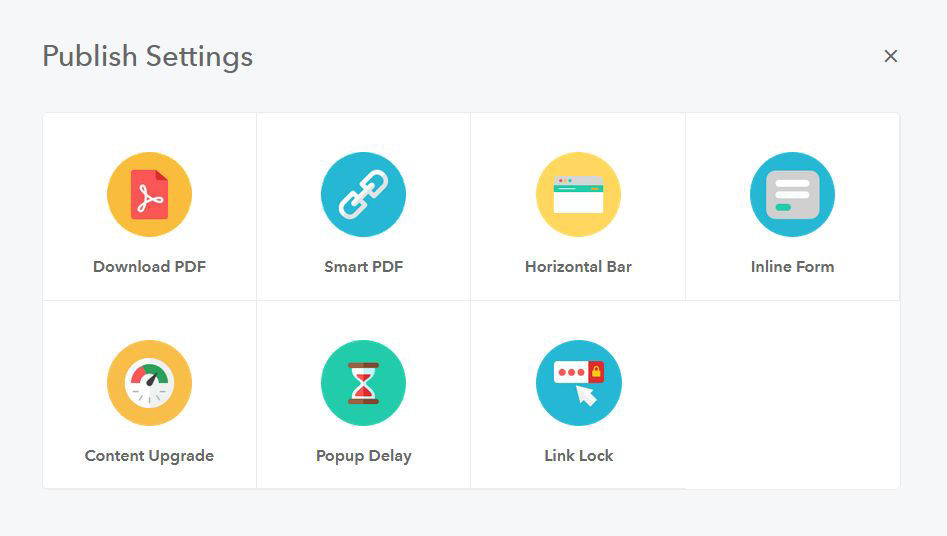
There are three types of forms you can create from Mailerlite: Pop-ups and Embedded forms.
There is another type of form called Promotions that is identical to Pop-ups.
Pop-ups are forms that flash on the page when people least expect them. These grab the attention of visitors and encourage them to sign up for your list.
On the other hand, you can stick embedded forms into any position on your page. You can place them within the content, on your sidebar, footer, and header, to name a few places.
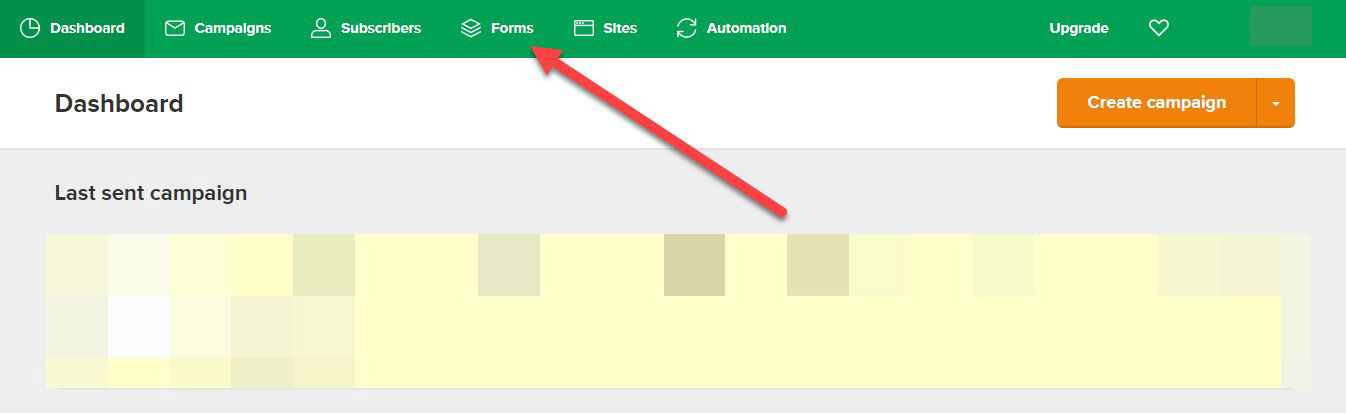
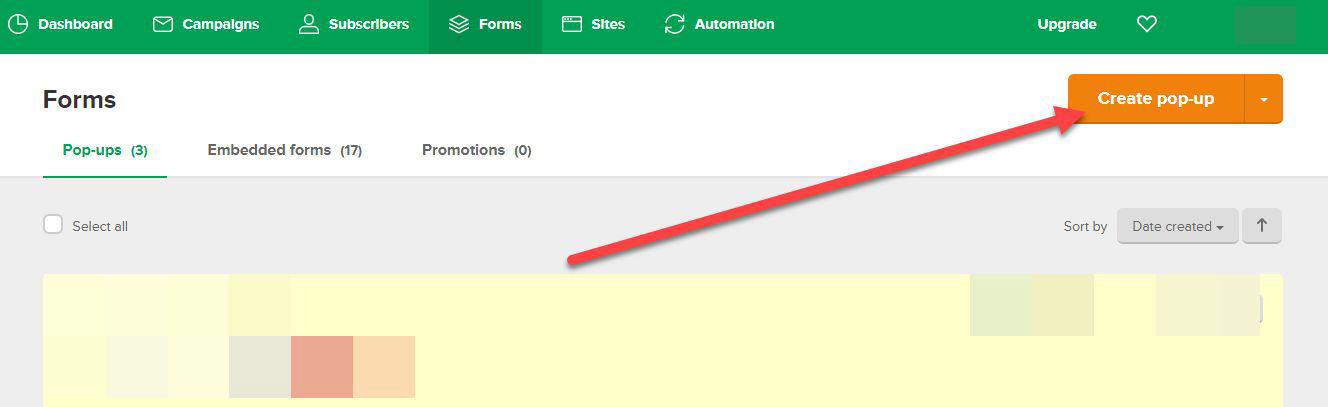
For now, we’ll create a pop-up form.

Then create a name for it. After this, you will choose the group where the tool will store the subscribers.
If you don’t have a dedicated group for this form yet, you can create a new one and give it a name.
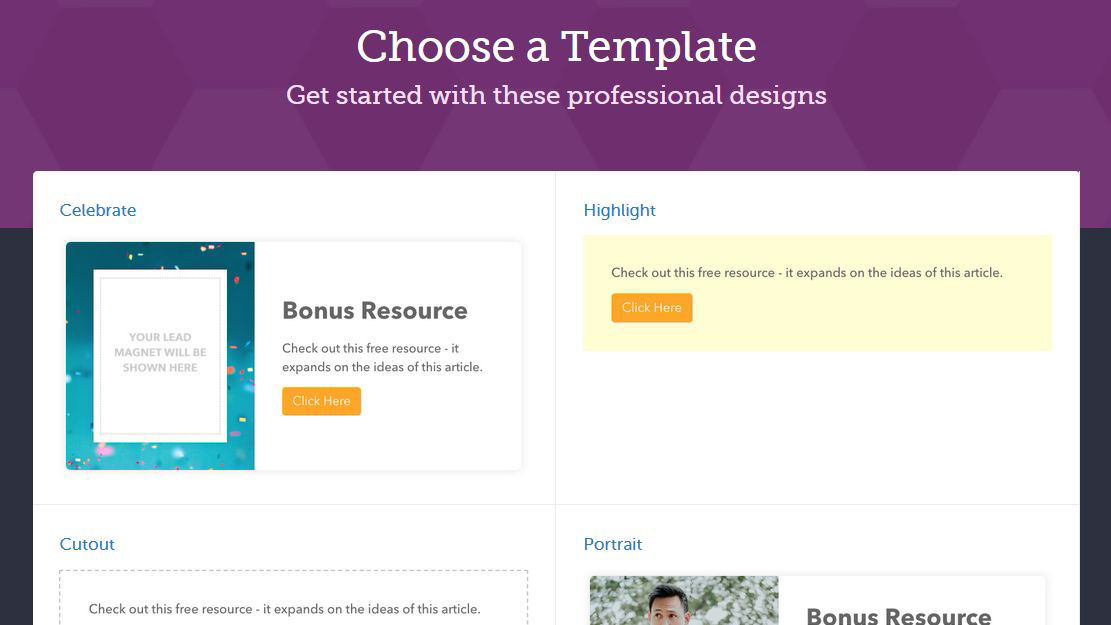
Next, you need to choose a template for your pop-up form.
It’s best to preview the form first before selecting it.
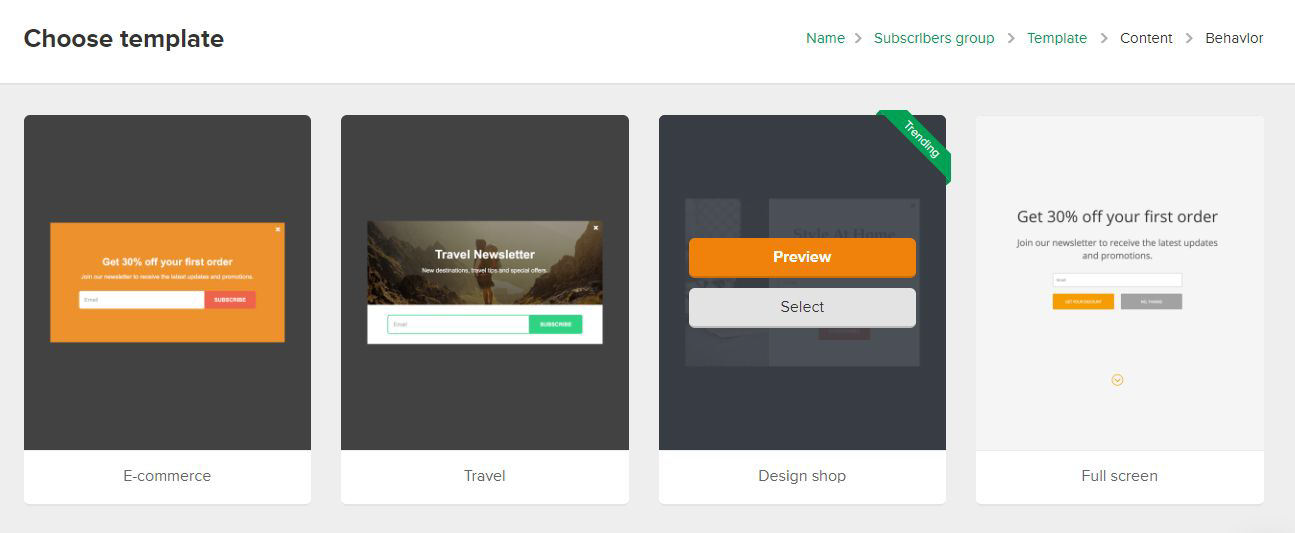
You can edit the form on the next page as you see fit. You can also edit the text after they successfully signed up to your list.
The best advice here is you don’t want to show the pop-up form immediately. You have to give them time to browse the page and its contents, which is why they’re there in the first place.
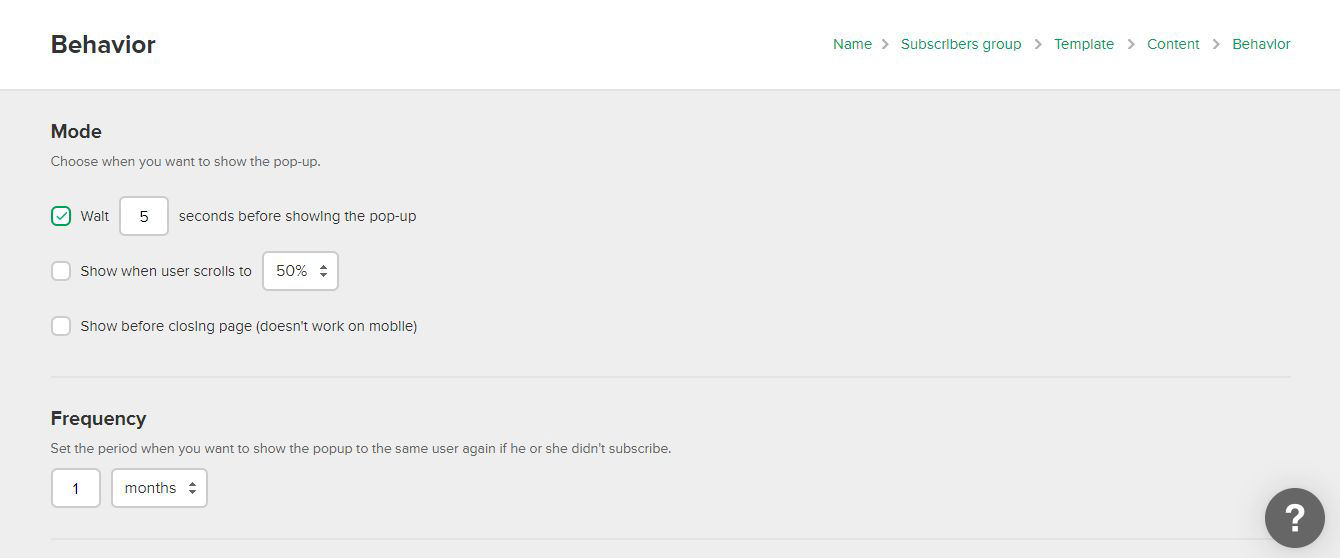
From here, you can make the form appear. Ideally, go with either a scroll-based trigger or exit intent.
The former will show the form after visitors have scrolled through a certain percentage of the page. This way, you know that they are reading the piece, which also increases the likelihood of them signing up to your list.
The latter is known to be one of the most effective ways to build your email list. Exit intent makes the form pop up when the cursor moves away from the window.
The great thing about exit-intent is its non-intrusive. It doesn’t disrupt the visitors’ experience on the page.
That alone should be reason enough for you to test this out on your form.
Next, you may want to determine which pages on your site should the form appear on.
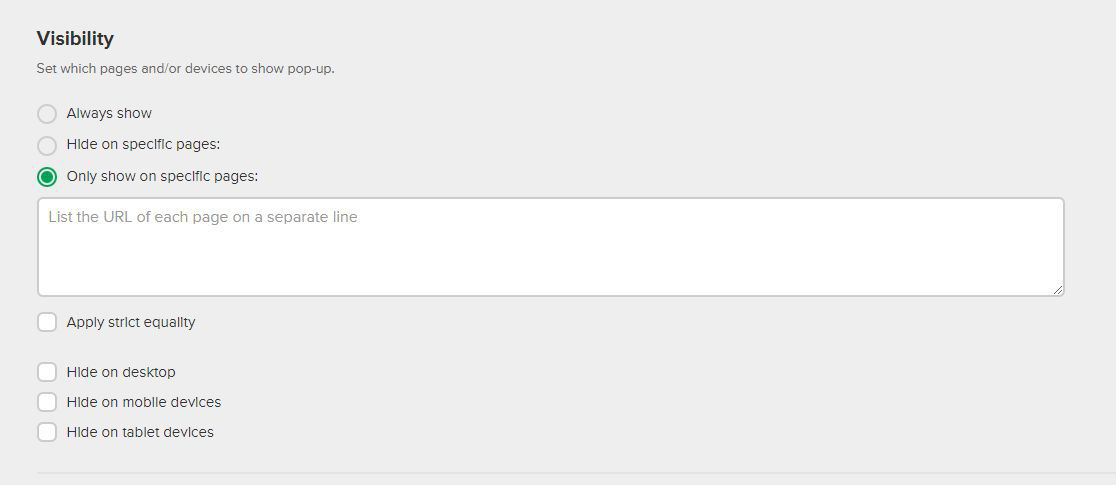
If you have a specific offer in your form, you may want it to appear only on pages with the same topic.
This way, you don’t annoy all your visitors with the same pop-up form on all your pages.
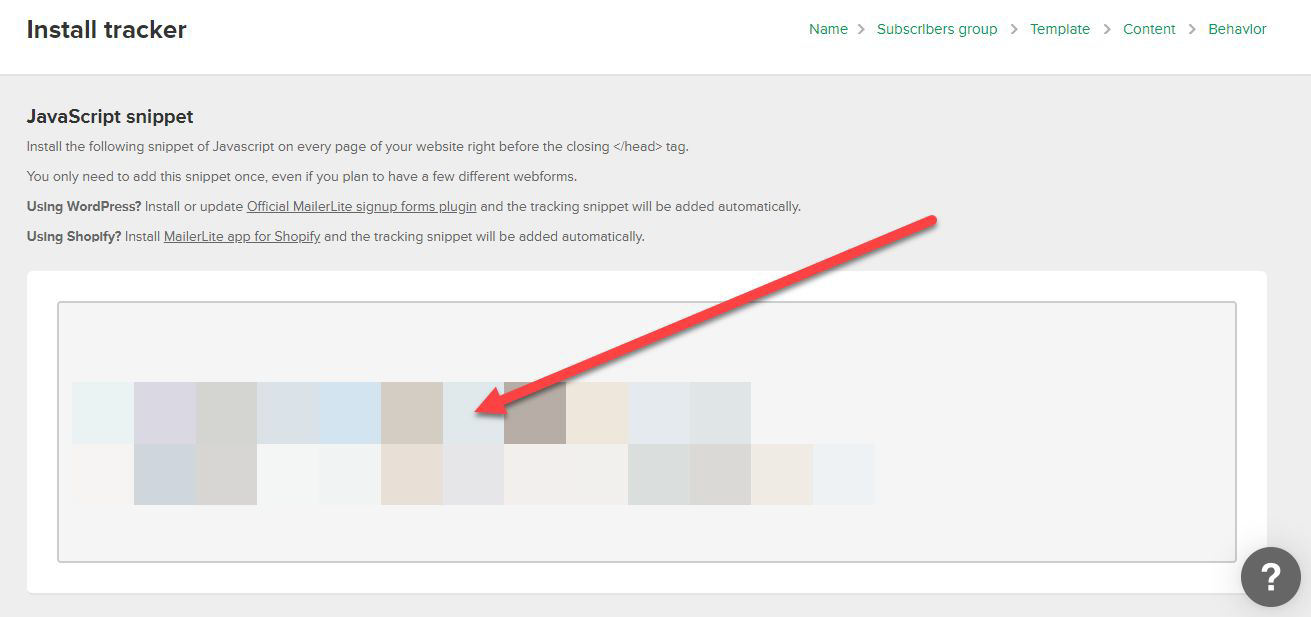
Once done, you need to install the tracker onto your site to make the form appear.
-
Getting more subscribers
I’ve shown you the steps to setting up an account for collecting emails using the forms you’ll create.
In this part, you’ll learn how to build forms that actually convert. These types of forms essentially answer this question:
“Why should I sign up?”
Most people sign up to a mailing list because they trust the person running it. But for those without the clout and influence yet, you need to communicate the benefit of signing up to your list.
-
Know your audience
Set up a buyer persona of your site. Break the persona down into different demographics to get a full understanding of who he or she is and what she or he wants from your site.
To know this, take a quick look at Demographics under Audience of your Google Analytics.
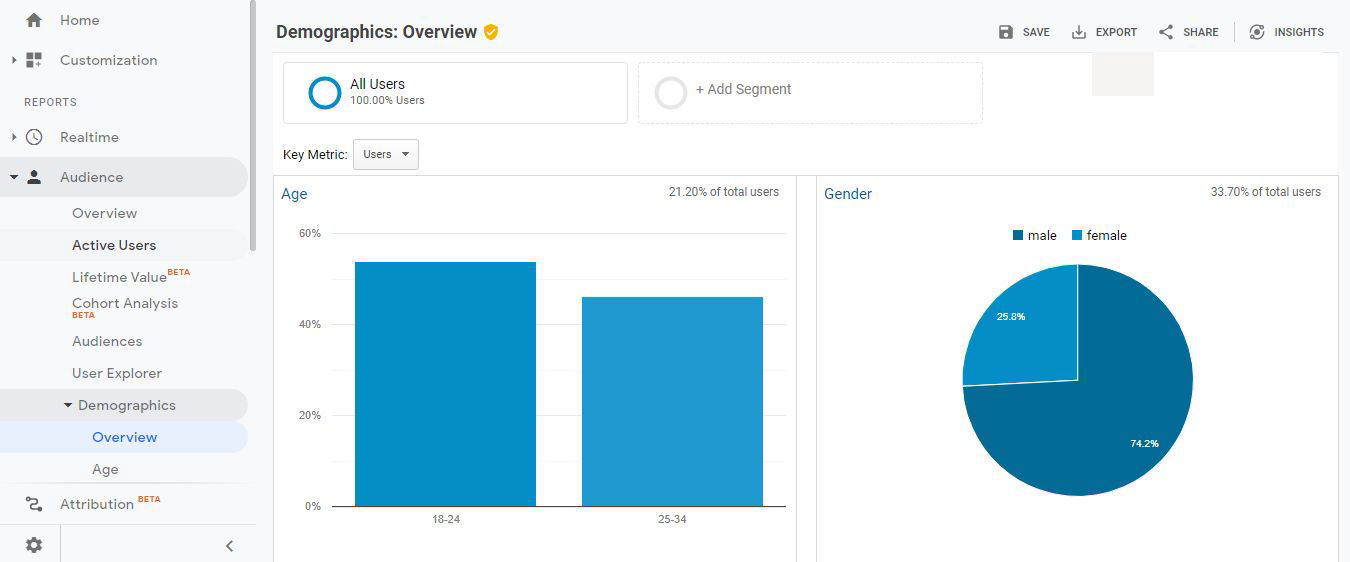
From here, you can see the percentage of age and gender of all your visitors. Also, the Interests section shows you the industries your visitors are affiliated with.
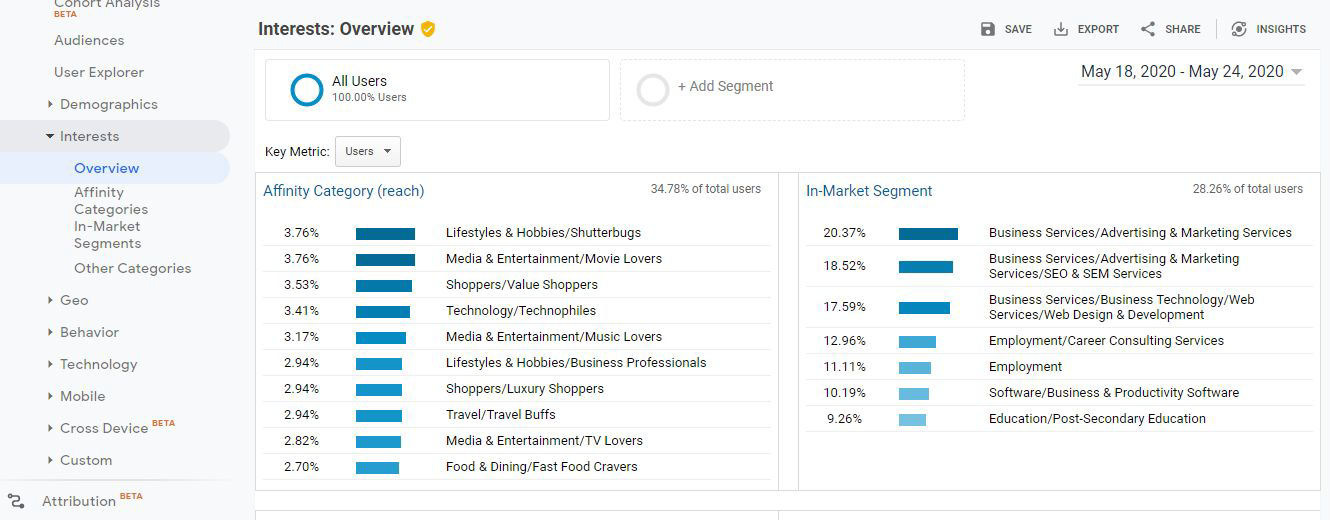
Use the information you find here to create your buyer persona.
-
Determine your offer
This is where the “why” question comes in. But since you know the demographics and interests of your audience, you can come up with an offer that satisfies their needs.
One of the best ways to get people to sign up for your list is by using content upgrades. These are exclusive bonus content that your visitors will get if they sign up as subscribers.
The great thing about content upgrades is they answer why people have to sign up. But for these to be successful, the exclusive content must be something that people will find useful.
Below are common content upgrades site owners use to drive more subscribers to their list:
- Checklists
- Mini-ebooks
- Whitepapers
- Resource list
- Video or audio recording
- Templates
What you want here is to create the type of content upgrade that’s easy to do but will yield the most conversions.
From the list above, checklists and mini-ebooks are probably the easiest to create because you can create them in a few minutes.
A tool you can use to create these is Beacon.
Create a free account and choose from the many lead magnets you can create to grow your list.
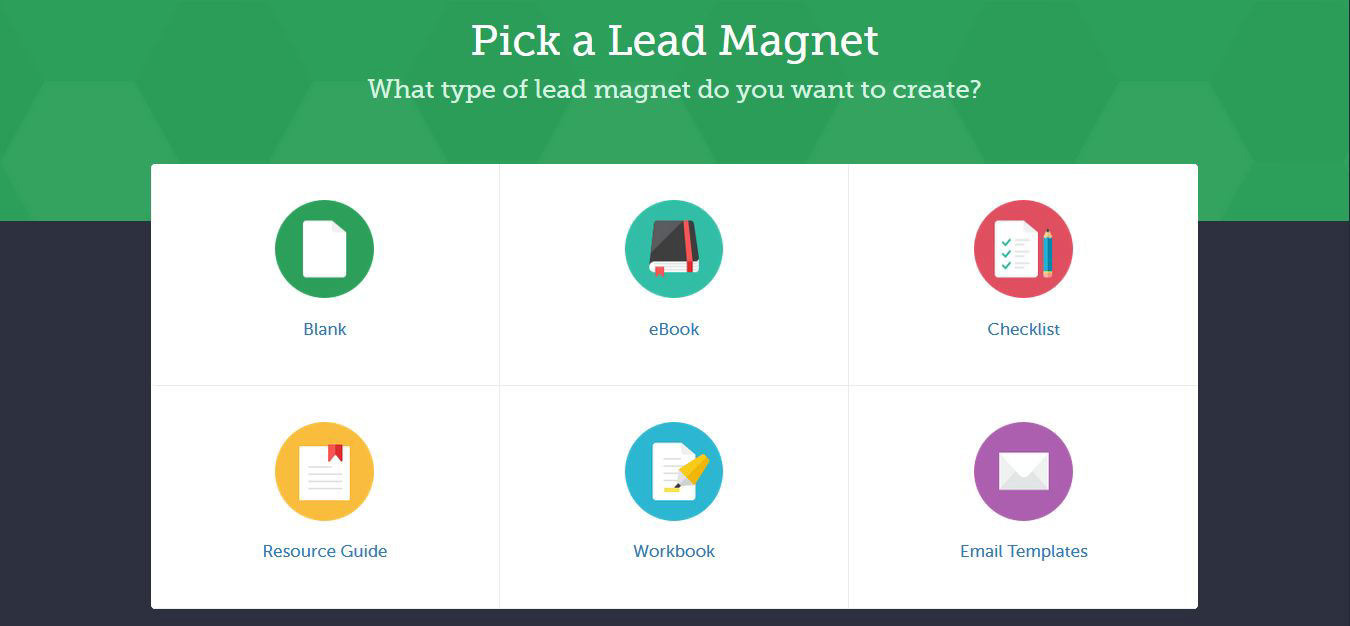
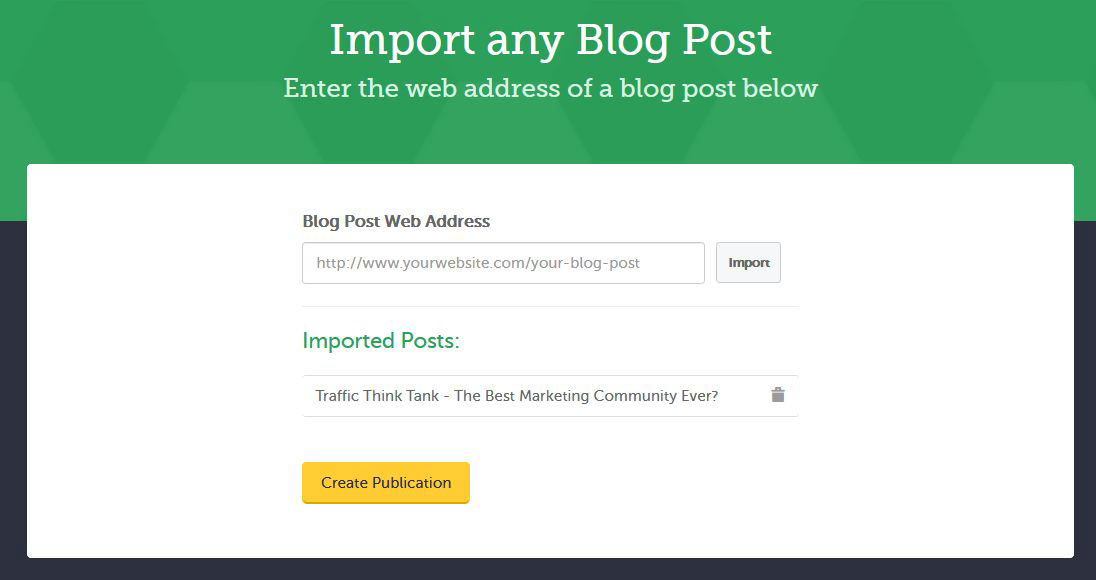
If you click on any of the lead magnet options, Beacon asks you if you want to import blog content to create the content.
This is what we mean when we said you can create certain content upgrades in minutes. With Beacon, you can export an existing blog post containing a checklist and turn it into a content upgrade!
For instance, You can decide to create a mini-ebook by using one of your blog posts.
Next, you need to choose a book cover design for the content upgrade.
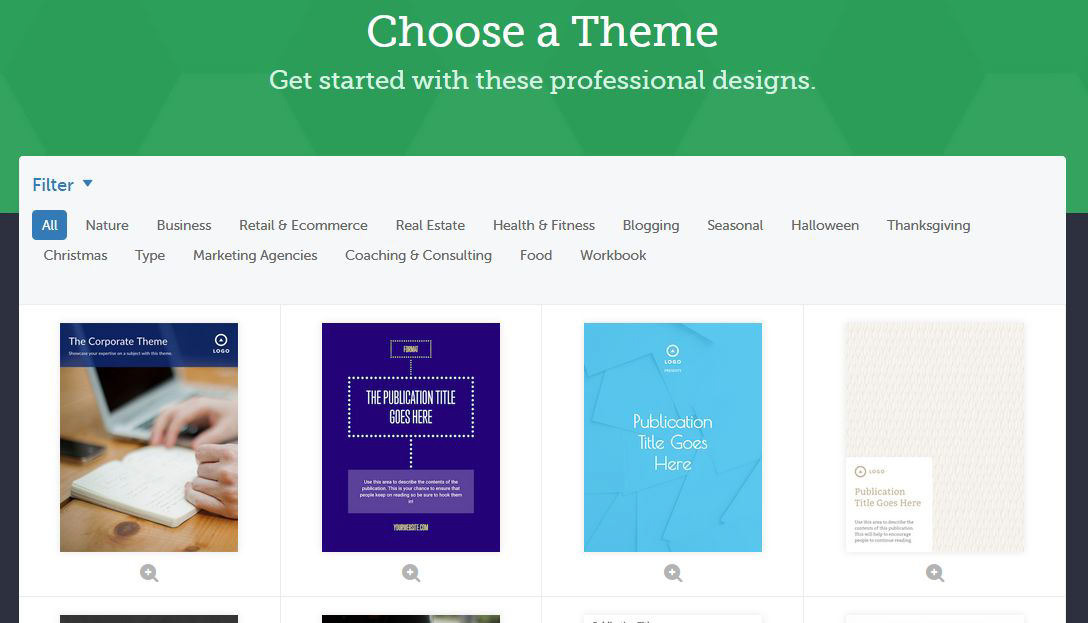
After choosing, you need to give your lead magnet a name.
Then you need to edit the e-book to achieve the look and feel you want. You also need to cut unnecessary sections from the lead magnet template.
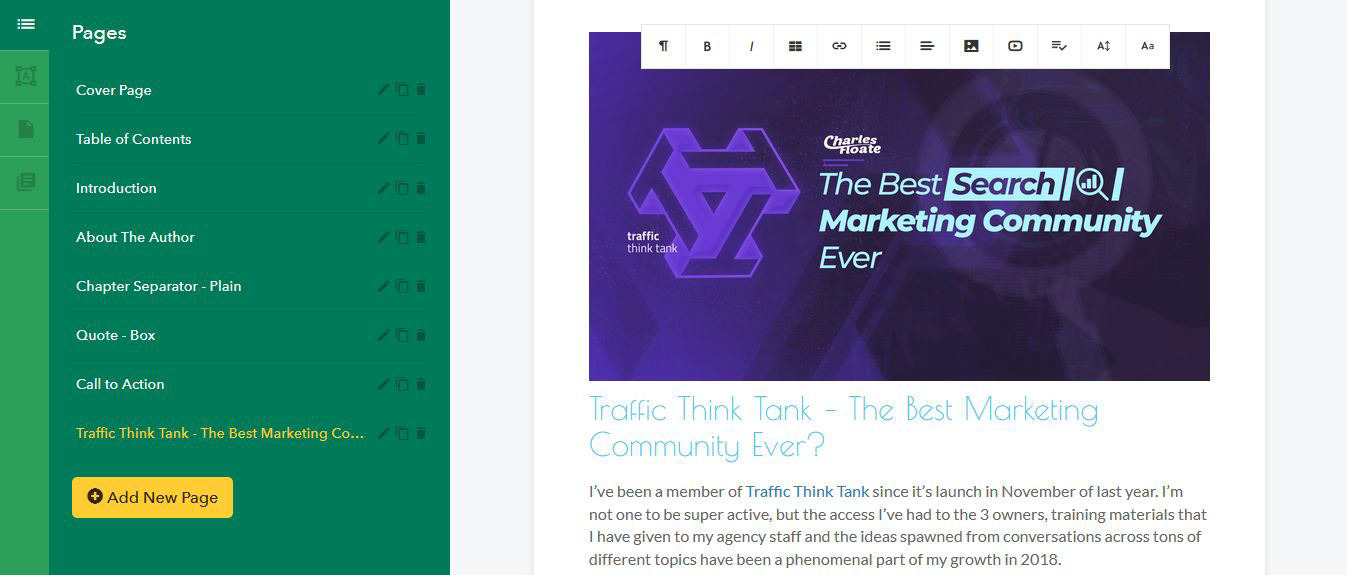
Once you’re done editing the content, click on Publish to see these options.
Ideally, you want to download a copy of the content upgrade in PDF format. This way, you can use it as part of your Mailerlite’s automation workflow campaign.
So, whenever somebody signs up to your form, they become part of your email list and they receive a link to your content upgrade.
The slight problem with this approach is setting up the automation. It’s not as intuitive compared to Beacon’s Content Upgrade.
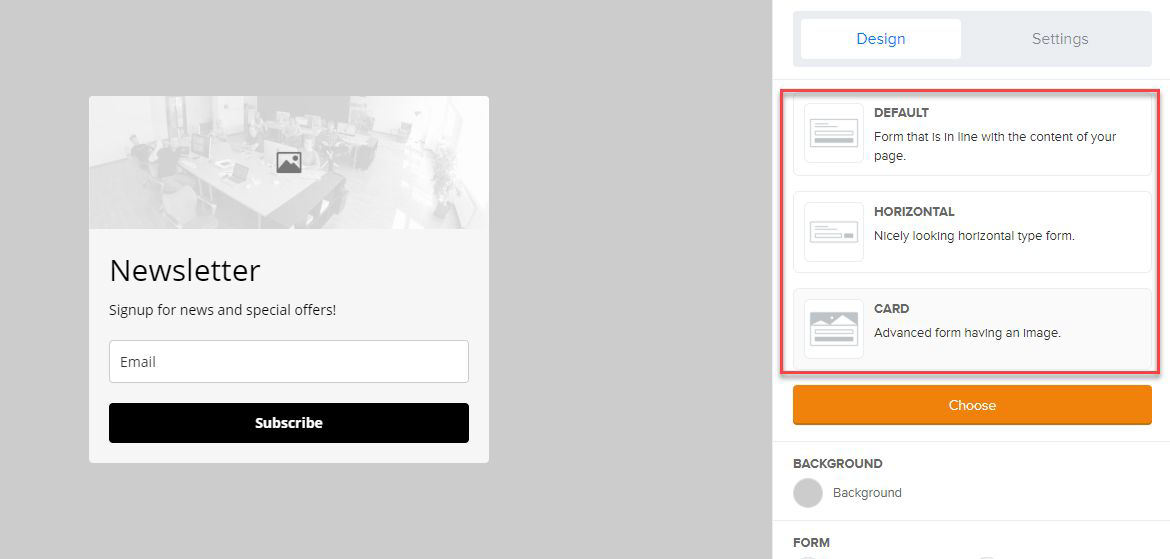
When clicking on Content Upgrade, Beacon will ask you to create a name for it and choose from the different form templates that you will use on your site.
Next, you need to customize the template that you will use as an inline form and the pop-up form that will appear after they click it.
If you decide on paying for Beacon, you can integrate Mailerlite into the content upgrades.
This way, when they fill out the form, their details will go directly to your Mailerlite group.
Use Beacon to create highly targeted content upgrades that your visitors would want to get to they can sign up to your list. Place your forms in the right places
As mentioned, your goal is to get as many subscribers as possible. That means balancing between the number of pop-up or inline forms you must use on a page and where you need to place them.
We’ve discussed pop-up forms you can create using Mailerlite.
Below are the different types of Embedded forms in the platform:
And below is a shortlist of places where you can embed these forms on your site:
- Sidebar
- Footer
- Within content
- After content
- Above the fold
Of course, it will be in poor taste if you feature inline forms on all the sections of your site pages. Adding the pop-up forms will only make matters worse.
The last thing you want is to bombard visitors with forms about your email list. And the first thing they’ll do when they see the forms is to close the browser window to your site.
It’s best if you can start with a few forms on your site pages – preferably, an inline and pop-up form (exit intent).
Give the forms a couple of days before looking at their engagement levels from your Mailerlite dashboard. It’s pretty basic, but it will have to do for now.
If they’re not converting, then consider changing the type of form to use on the page. You can also edit the copy of the form, the color of the button, and other variables to get more subscribers.
It’s just a matter of trial and error and there’s no way around it.
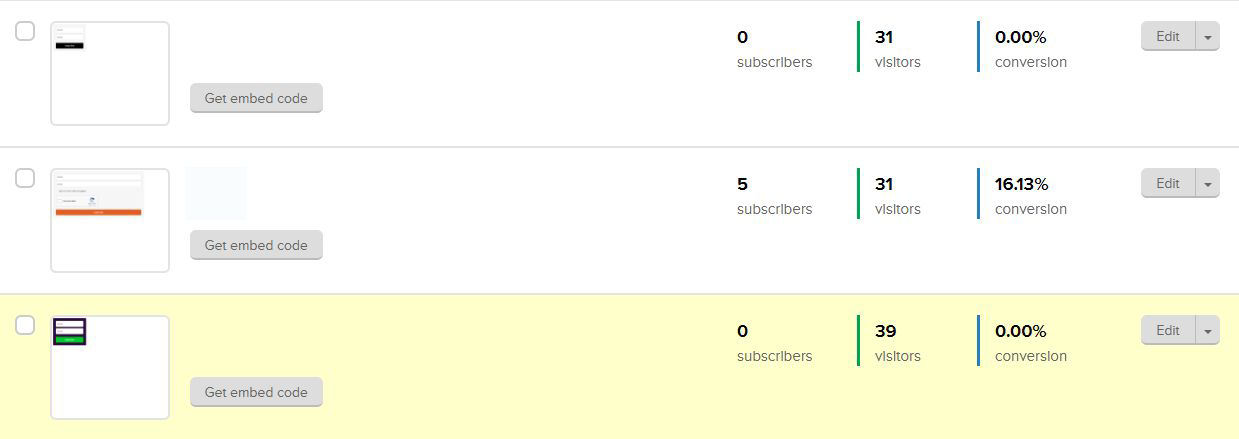
However, to help gather more information about your forms, you can use lead capture tools like Optinmonster which provide more data about the performance of your forms.
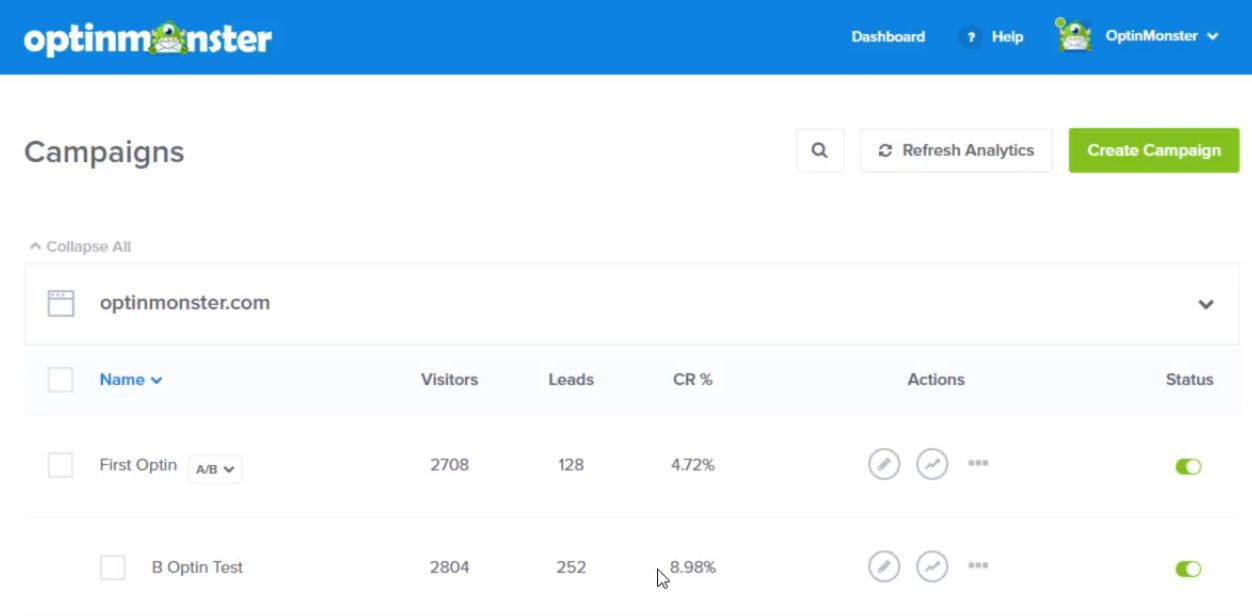
From here, you can set up an A/B testing campaign to see which of the forms you’re comparing perform better.
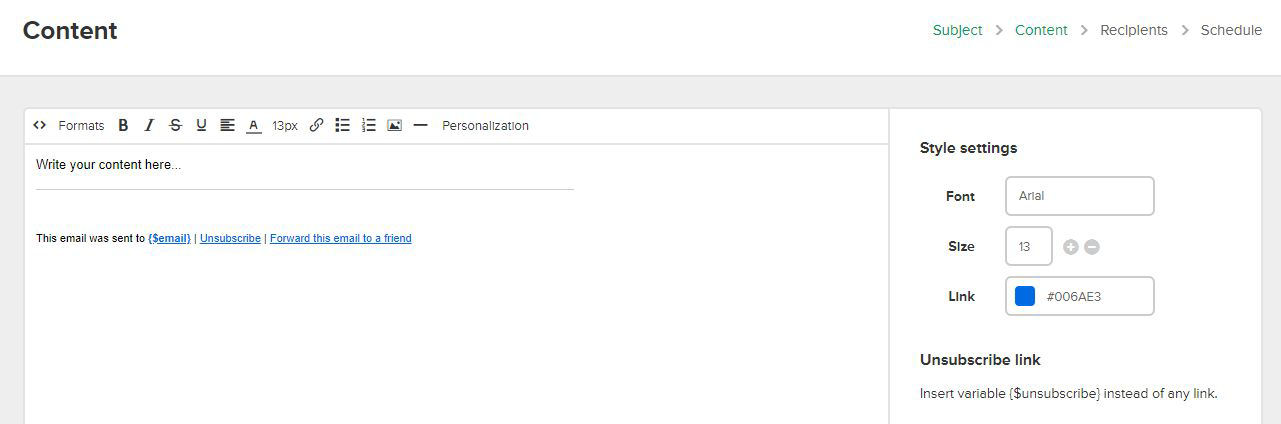
2. Writing Newsletters
Now that you have people joining your email list left and right, it’s time to engage with them via newsletters.
Newsletters are emails meant to inform subscribers about the latest updates in your business. They are not like drip campaigns that are fixed emails you automatically receive.
The good thing about writing newsletters is you don’t have to worry about optimizing them for search engines because their purpose is to build better relationships with your subscribers.
Aside from pure engagement, newsletters allow you to include affiliate links that readers can click.
This way, you can monetize your subscribers, but only if you do it wisely. Best of all, your newsletters will go straight to their inbox, which means there’s a good chance that they’ll open and read them.
However, this doesn’t mean that it’s all sunshine and rainbows. You still need to compose a newsletter that will encourage recipients to open it and read it to the end before clicking on your call to action.
Below are rules of thumb to help you knock your newsletter out of the park:
-
Check out what good emails look like
If you’re not sure how to design or craft your newsletters, then look at the newsletters featured in Really Good Emails.
Aside from newsletters, the site shows different types of emails from brands and businesses.
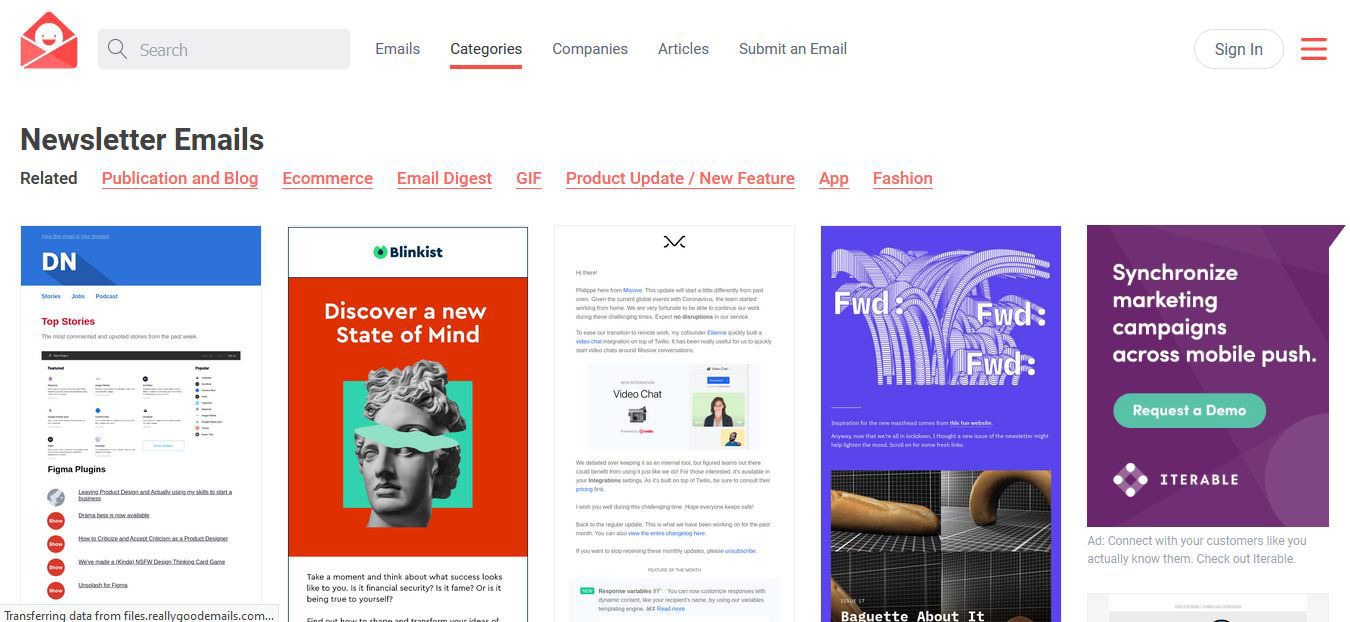
Browse the Newsletter Emails category so you can see how other brands craft their emails.
This way, you can draw inspiration on how you should communicate your brand through your newsletter just like in the examples on the site.
-
Personalize your email
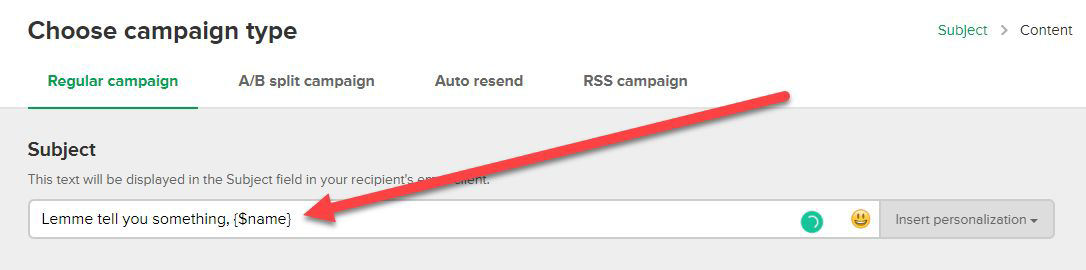
Mention the name of the recipient in the subject line and/or body. This shows them that you know who they are and gives your newsletter a personable approach.
-
Simple is better
You’d think that designing your newsletters and broadcasts would yield good results. However, text-based emails perform just as good, if not better!
This type of email focuses on the message of the email. It doesn’t distract readers from the colors and elements used in the layout of the newsletter.
-
Test, test, test!
It’s vital to understand the performance of your newsletters for a period after sending them out. You can’t stick to doing the same thing if it apparently doesn’t work.
As for your newsletters, you need to act fast if people aren’t opening them or clicking on the links you placed in there.
There have to be reasons why they’re not doing the things you want them to do with your emails.
By knowing these reasons, you can slowly make changes to your newsletters and monitor if any of those tweaks improved your conversion rates.
And even if you did improve this time out, you need to keep testing other ways to further increase your open and click-through rates It’s a never-ending process of making your newsletters better so you can make more money!
3. Social Profiles
Think of social media as online tribes. Each tribe shares a set of values exclusive to their group. They also have a particular way of communicating and engaging with members.
therefore, you must need a tribe where you can find like-minded people and connect with them in meaningful ways.
Doing so will give your online business another revenue stream you can capitalize on! Now, before getting started, let it be known that I’ll only deal with certain platforms that you can use to grow your website.
For instance, we won’t be talking about Facebook Pages because their organic reach has been abysmal for a long time. Making a concerted effort to drive value to your Facebook page is only a waste of time and effort.
There are platforms that are probably too niche or still too recent to be used by businesses on all levels. It’s then better to leave them off this section so now.
That said, below are two of the tried and tested social media platforms that you need to build and use for your website:
Through the years and the changes it underwent, Twitter remains one of the best social media sites to connect with people online.
In a nutshell, this unique platform lets you publish short messages for others to see and react to.
At the same time, you can follow people with whom you want to connect with and build a following of your own.
Your goal in using Twitter for your business is to grow a follower base so you can promote your business more effectively. This way, you can convert them into customers of your site.
Below are ways on how you can do this.
- Optimize your profile
Your profile is the first thing people see from your account. Therefore, putting an effort into making your Twitter account look good goes to show that you’re serious about building connections using the platform.
For starters, consider creating a custom header image. It’s premium real estate since you can add calls to action in the image.
Canva has a Twitter header template that you can use for free. Log in or sign up for an account here.
Once logged in, click on the Marketing tab under Create a design then click “See all.”
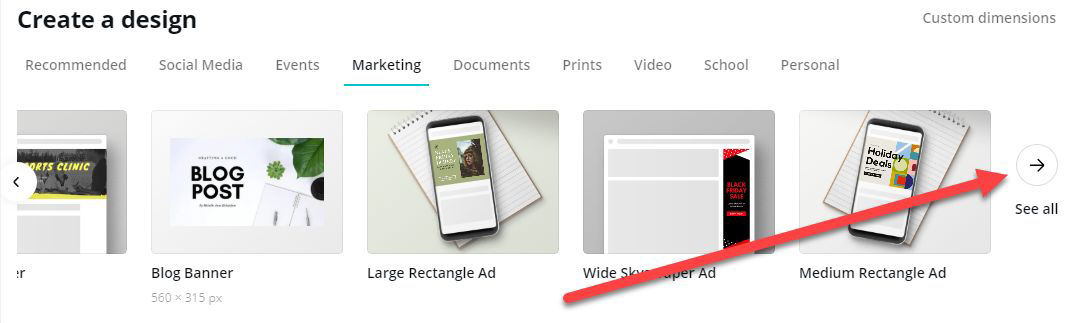
Then click on Twitter Header under Social Media.

Once you’re on the editor page, choose from the templates on the sidebar.
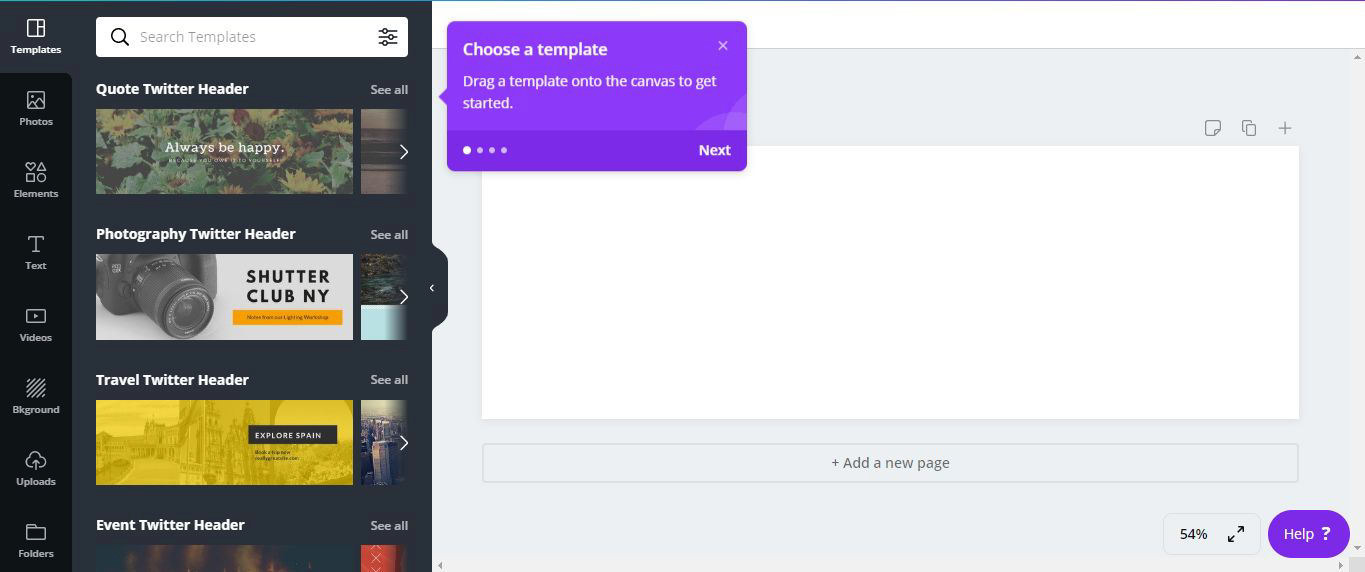
This way, you don’t have to start from scratch and can design something fast and quick.
The great thing about Canva is how intuitive it is, which makes it perfect for non-designers. Just drag and drop the block from the side to the canvas and edit as you see fit.
Once you’ve uploaded the header image, the next thing you should optimize is your bio.
You have 160 characters to write your Twitter bio – make each character count!
You can play it straight by describing how you are and what you do for a living. However, if you want to make an impression, it’s best to share something unique or write something witty about yourself or your business.

You may think you’re not as big as Wendy’s to pull this off. However, maybe it’s time you need to think big about your website. That way, you can achieve the same success that these brands have.
Also, feel free to use hashtags in your bio to make it easier to find you on Twitter. But don’t go overboard and cram hashtags in there.
Finally, feature a Pinned Tweet on your profile. Think of this as putting your best foot forward.
You want to pin a tweet that tells them everything people need to know about your website. You can pin your best post that they should read.
You can also pin a call to action that you want potential followers to take. To do this, you should have published the tweet on your account.
If so, click on the drop-down icon on the top right corner of the tweet and select “Pin to Your Profile.”
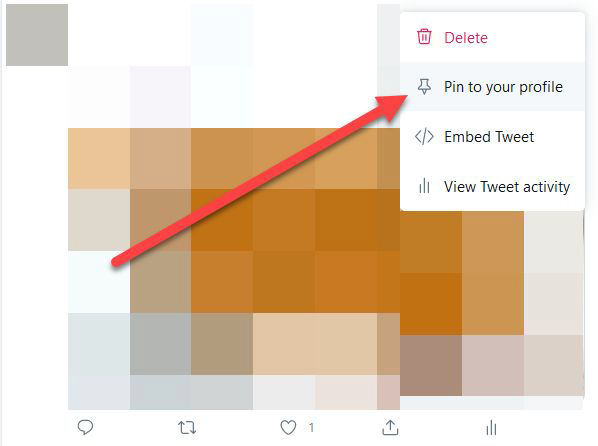
If done correctly, it should appear at the very top of your Twitter feed. It stays there even if you sent out a more recent tweet.
You can change the Pinned Tweet by unpinning first before pinning the new tweet.
- Automate content publishing
Another way to attract followers is to tweet out content your audience loves. By consistently sharing articles relevant to your topic, you can attract like-minded people and get them to follow you.
However, doing this requires you to manually curate and handpick content you want to share.
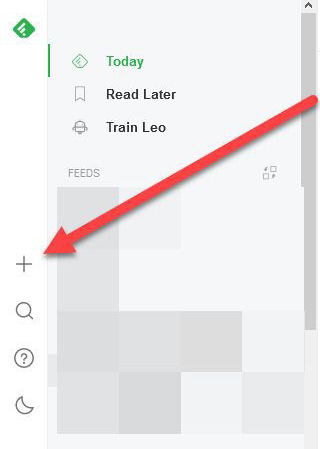
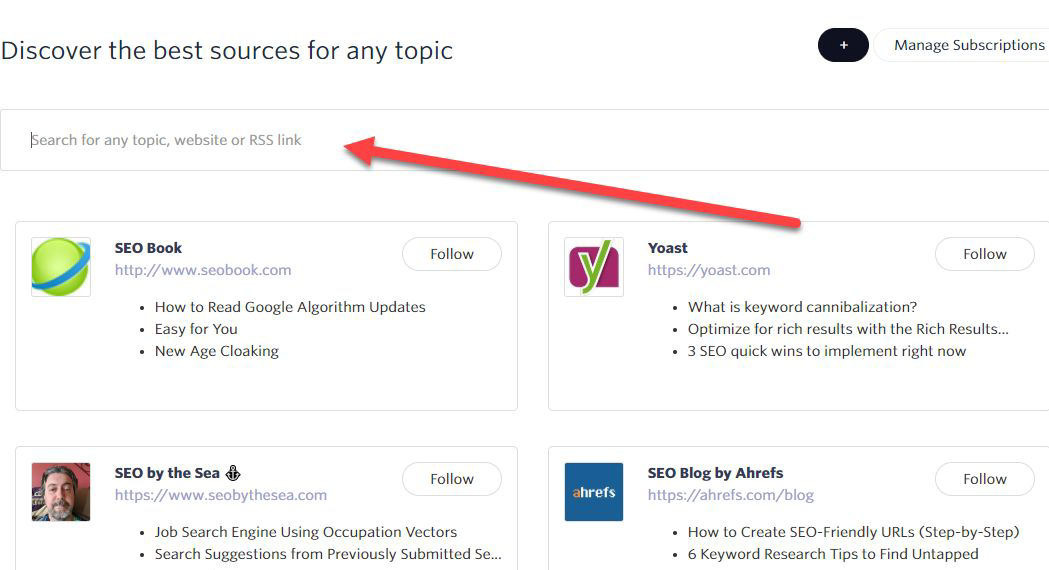
You can do this by signing up for a Feedly account. The site helps you keep in touch with the latest news and trends about your topic of choice. It pulls out articles from different sources like Twitter feeds, Google Alerts, and RSS feeds so you can monitor all of them in a single dashboard.
After signing up for an account here, follow new sources by clicking on the plus icon.
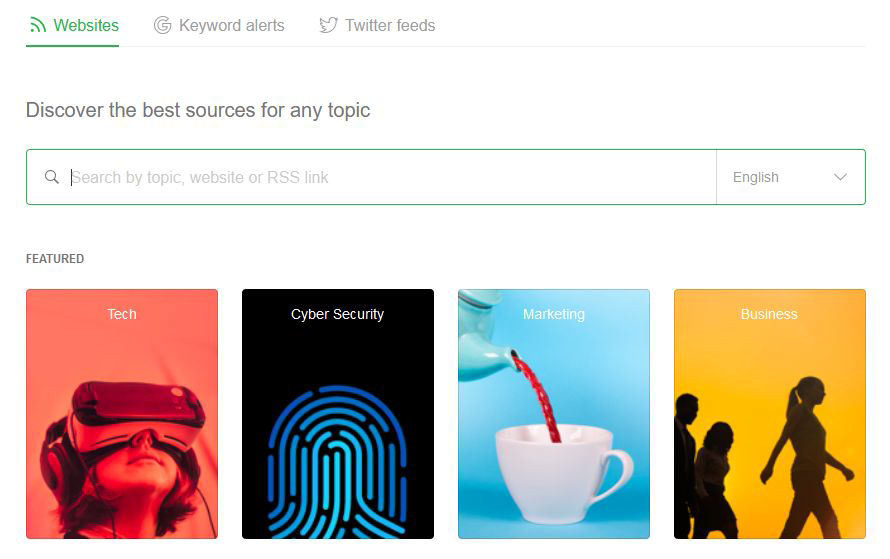
From here, you can discover the best sources by typing in your topic or choosing from any of existing topics below.
You can search for sources from keyword alerts and Twitter feeds, but these features are only available for the site’s paid plans.
Once you’ve done your search, you can add the sources to a feed.
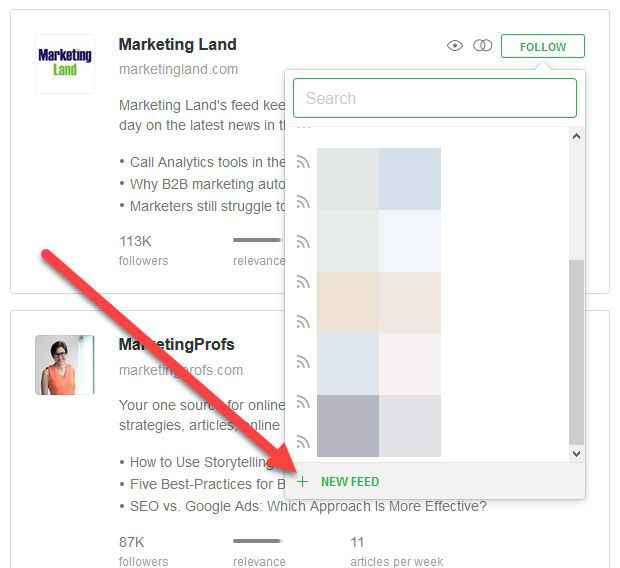
Follow as many websites as you want so you have a feed from sources that publish content relevant to your topic.
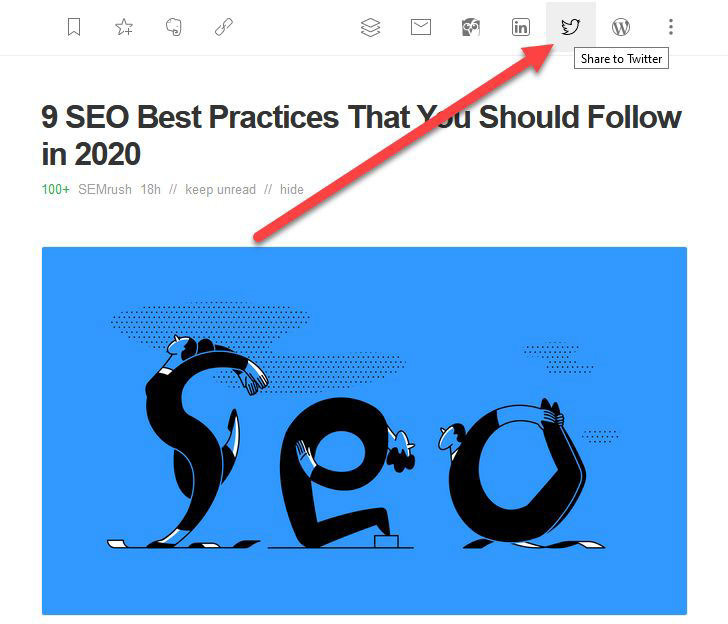
Click on the articles you want to share and click on the Twitter icon.
This is the manual way of tweeting out content from your account. Now, there is another way where you can tweet articles on autopilot.
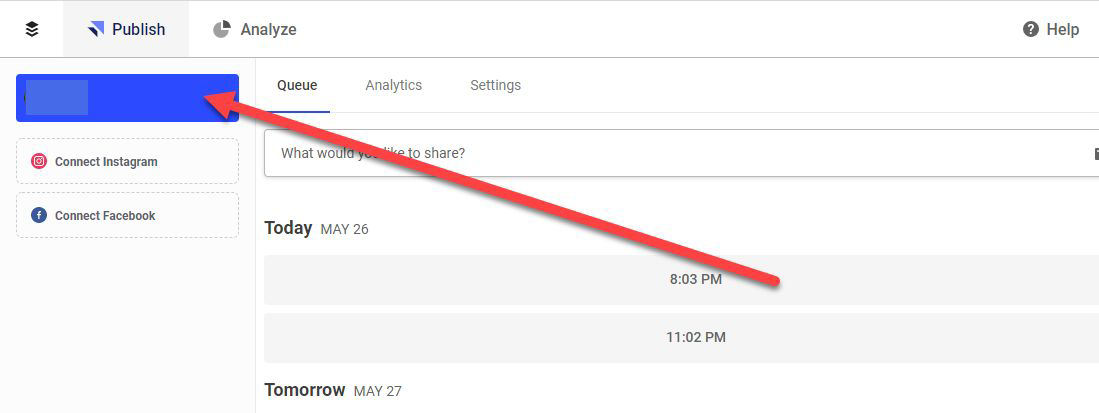
First, sign up to your Buffer account . You can try out the Business plan for 14 days at no costs to you. After that period, you get a free limited plan where you can share content straight from your web browser and schedule them at the best times.
On the dashboard, you need to set up your Twitter account so you can schedule tweets from the post.
It should look like this if you set it up correctly:
However, that’s not the reason you’re signing up to Buffer.
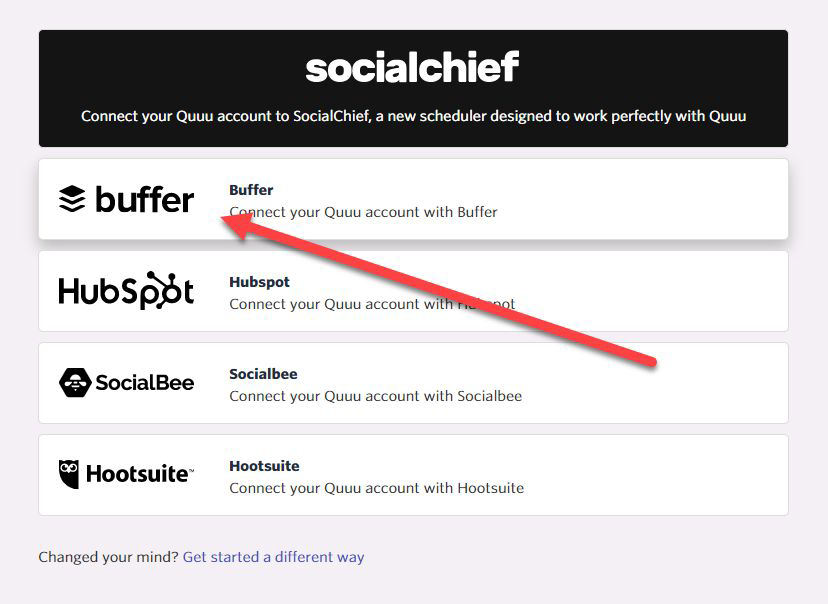
Once done, go to Quuu by clicking here and create an account there. Quuu takes care of choosing content to share on your social media accounts so you don’t have to. Just set up your account properly and it will schedule posts relevant to your topic automatically.
Upon logging in, it will ask you to connect to a social media tool so it can schedule the tweets for you. Since you just created a Buffer account, choose that.
On the next page, make sure that the content suggestions are automatically scheduled on your Buffer. Also, set the content suggestions to as many as you want to get more tweets out from your account.
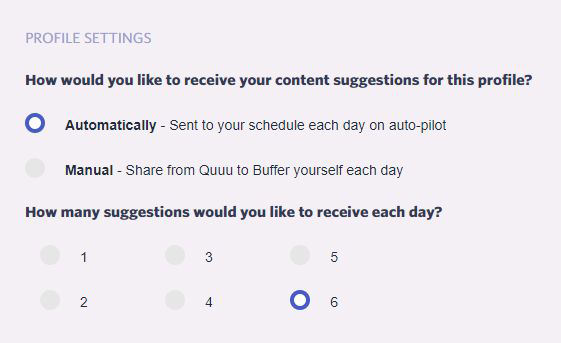
Most importantly, choose the topics that Quuu will get suggestions from before confirming the settings.
Give Quuu time to gather suggestions for your topic and schedule them to your Buffer account. This way, you let Twitter work for you even without doing anything!
- Adding followers
Your profile and content should allow you to rake in followers passively. But if you want to put an effort in getting more followers faster and better, then follow the source.
In this task, you want to follow influencers in your niche with thousands of followers. The goal is to build relationships with these influencers and create opportunities for your website.
To determine who these influencers are, go to Tweeple Search by clicking here. Create an account using Twitter to access more features.
Upon logging in, type in the topic of your niche or choose from the choices below the search bar.
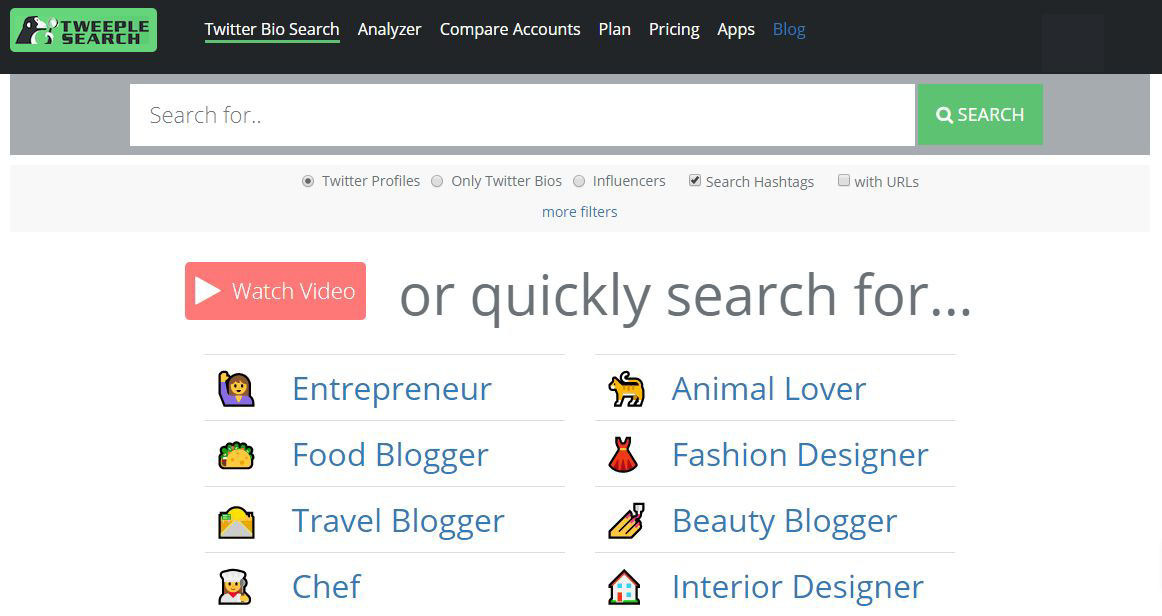
The results show people with the most followers for the topic. You can also see the number of tweets they sent out and the number of lists they’ve been included in.
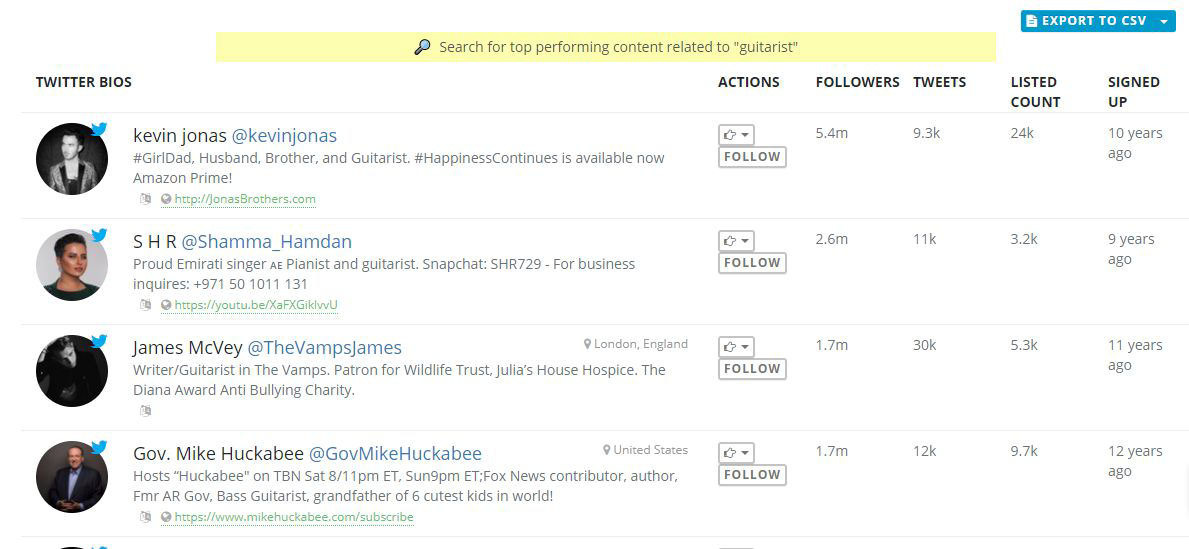
Browse through the list and find people whom you can reach out to and connect. To help you identify which among the influencers you should prioritize first, enter their handle on the Analyzer feature.
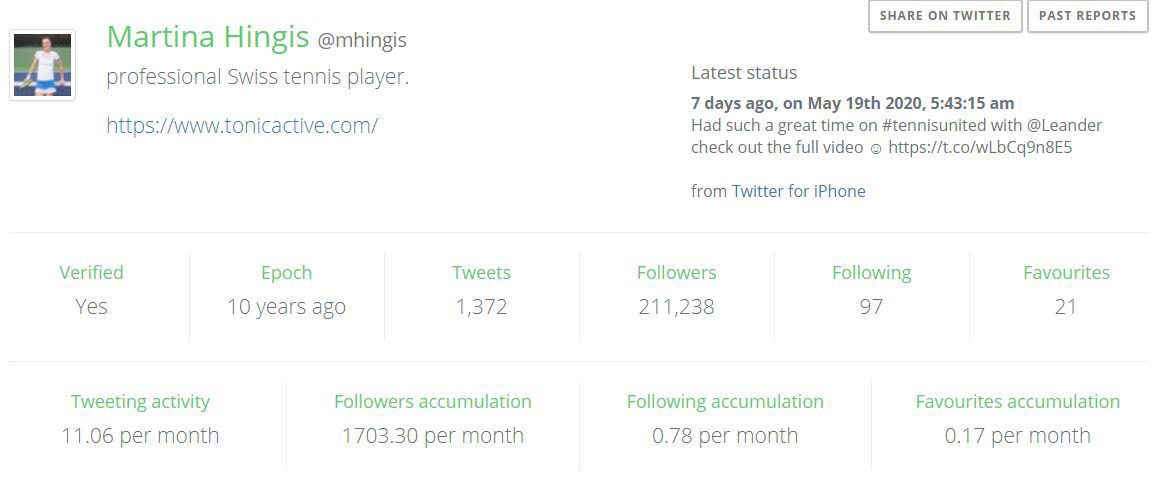
It provides insights about an influencer to help you decide whether to connect with them or not. You can do this by looking at how active they are on Twitter based on their tweets.
The more active they are on tweeting, the more you should consider reaching out to them.
Now comes the hard part. Getting influencers to reply to you is difficult unless you have a strategy in place.
The key to engaging influencers is they have to know you first. Once you’ve identified your influencers, plug in their site’s RSS feed to Quuu.
This way, the tool automatically shares their latest posts to your Twitter via Buffer.
Next, browse their feed to find tweets you can reply to. Spread out the replies over a period to make your engagement as organic as possible.
If possible, you can also leave comments on their blog posts to take your engagement further. Doing these things consistently should get the attention of the influencers and would compel them to reply to your messages.
And to do that, you need to leave insightful comments or replies that make the conversation forward. Comments like “great post!” and the like won’t get you anywhere. If they do, use this as a touchpoint when reaching out to them personally. Mention that you
share their posts on Twitter and leave comments on them.
At this point, they should already recognize you and will be more willing to get back to you.
From here, you can propose the following:
- Working together on a blog post, an e-book, or a course
- Writing a guest post on their site or blog
- Give them content that you made exclusively for them
Again, you need to deliver value first before they can reciprocate and help promote your content to their audience.
Believe it or not, Pinterest is arguably the best way to generate traffic from social media.
By sharing visual content on the platform that links to your website, you can compel users to funnel down to your site and get them to buy from you.
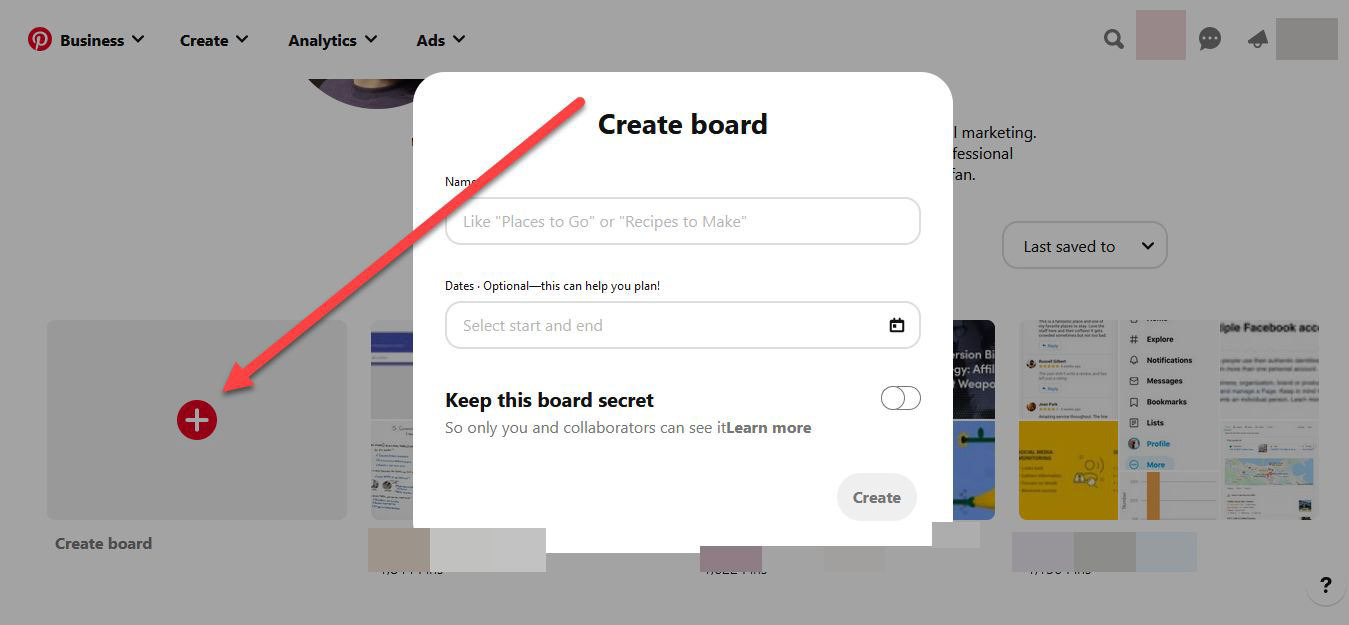
You can also amass followers if they enjoy the pins on your profile. For starters, you need to create a Pinterest account by clicking here if you don’t have it yet. Once logged in, you need to create a board for your site.
The board is where you can pin images of your posts on your site and others.
The goal is to curate posts that share the same topic. Aside from your blog posts, you can take from other websites to fill out your board.
After creating the board, fill it up with your content. But before doing that, your posts need to have an image with the correct dimensions that you can pin. It must have a 2:3 ratio for optimum display.
If you don’t have images with these dimensions for your post, create one using Pinterest templates on Canva.
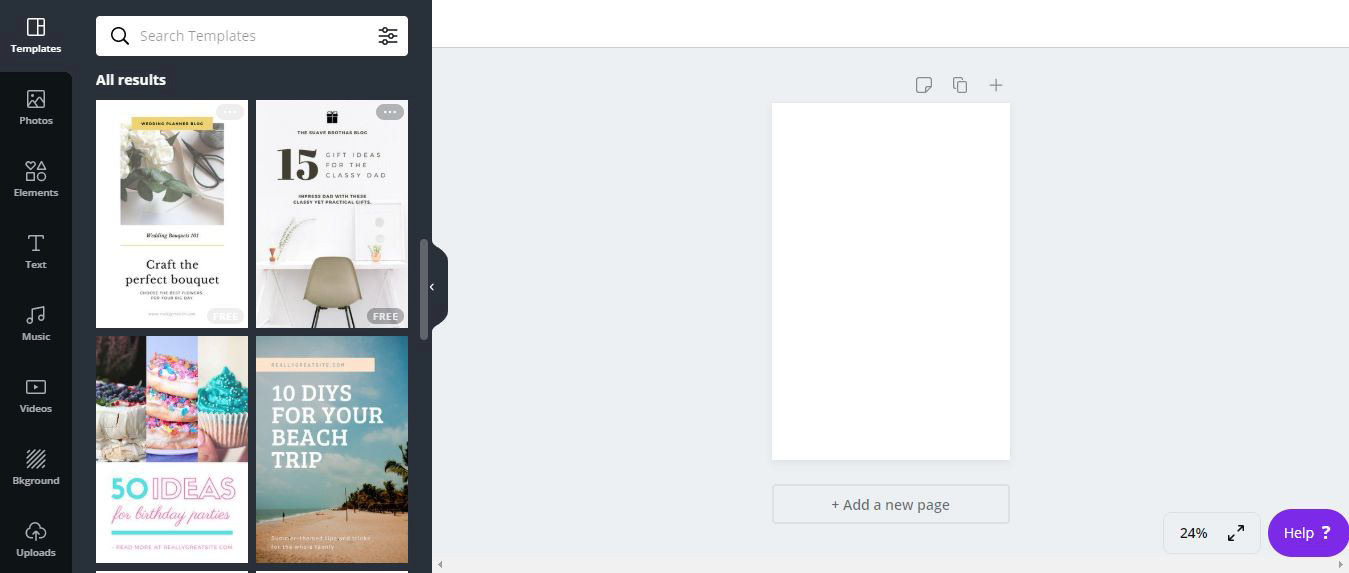
Edit the templates available from the site to finish quickly. Focus on the best pages on your blog to pin on Pinterest so you don’t have to create an image for posts that aren’t getting traction.
After creating the images, feature them on the respective pages on your site. Next, you need to pin the images from each site onto the board manually. This applies only to published posts on your site.
Moving forward, however, you can set up an IFTTT account by clicking here to publish your latest posts via RSS feed on Pinterest automatically.
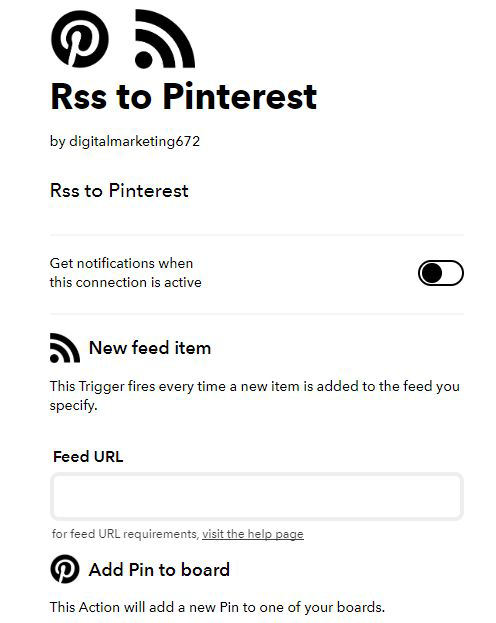
Instead of your RSS feed, you can also use another site’s RSS feed to curate their content directly to your Pinterest board.
However, if you’re this particular trigger, you can’t create the same one anymore. So it’s either you promote your site’s RSS or another site’s.
Also, the trigger won’t maximize the opportunity to drive more traffic to your pins.
Pinterest encourages you to keep resharing so more people can see your new and old pins. In this case, it’s best to go with the paid route, and it starts with using Tailwind.
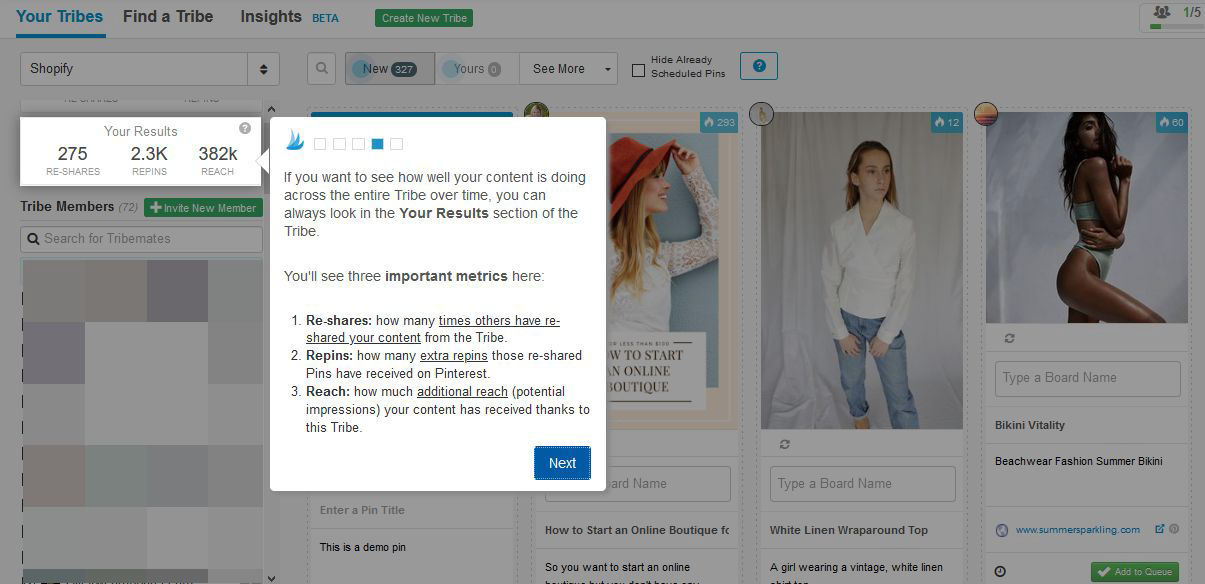
Aside from scheduling your pins timely and automatically resharing old and evergreen content, the tool also gives you access to tribes or groups of users within the same niche.
From here, you can share similar content and get shared in return, as well as connect with Pinterest influencers.
Once you have an account, access the Tribes feature by choosing a minimum of three topics.
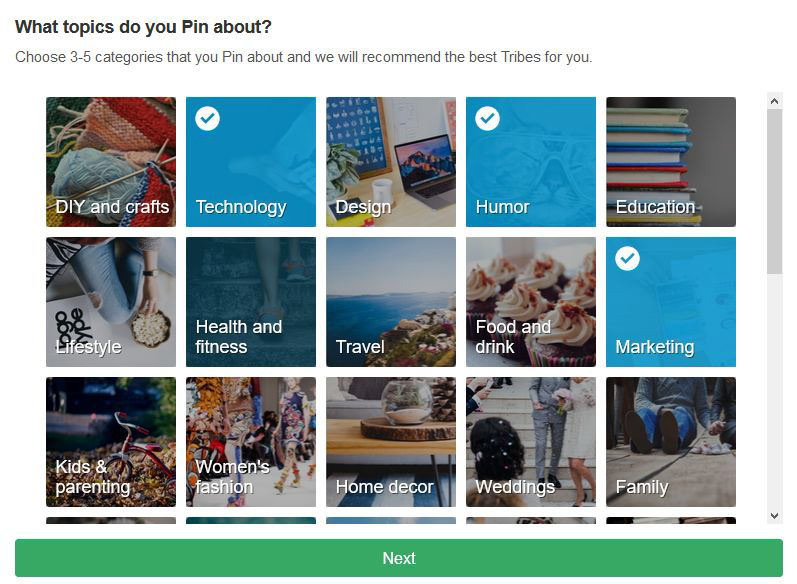
The tool will then share with your tribes based on the chosen topics that you can join. Once you’ve joined the tribes, you can share your pins with the tribe and analyze their performances. You can also repin others to curate your boards.
With Tailwind, you can schedule pins and connect with influencers on Pinterest in a few clicks. This way, you can focus on analyzing your result and growing your profile further.
However, if you insist on cutting down your costs, then there is a way. Pingroupie is a site of different Pinterest groups you can join.
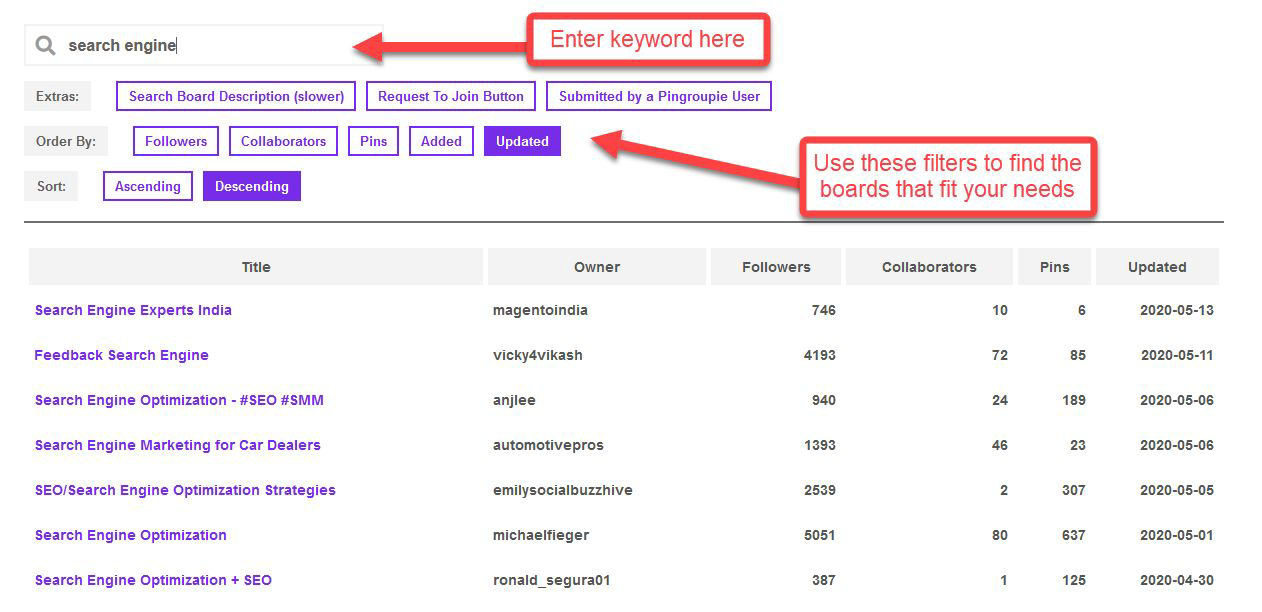
Make sure to click on the “Request to Join Button” on Extras to show boards that are accepting outside contributors.
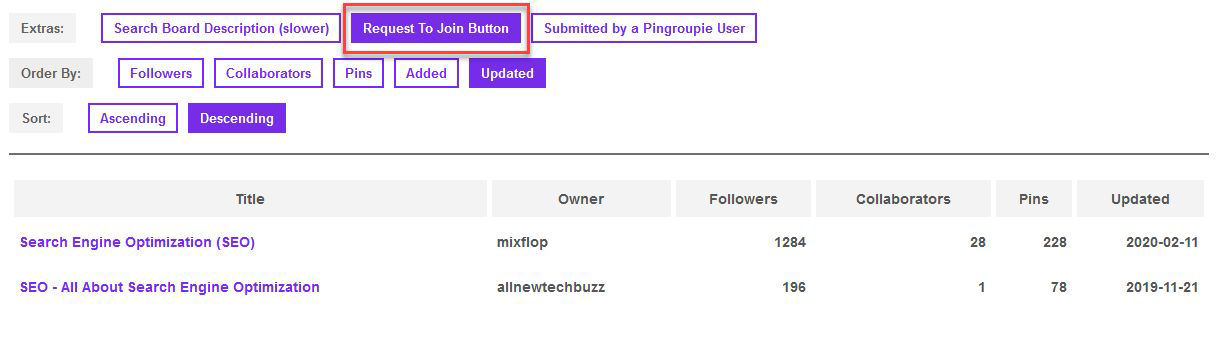
If you click on any of the results here, you should see a button like this on the board.
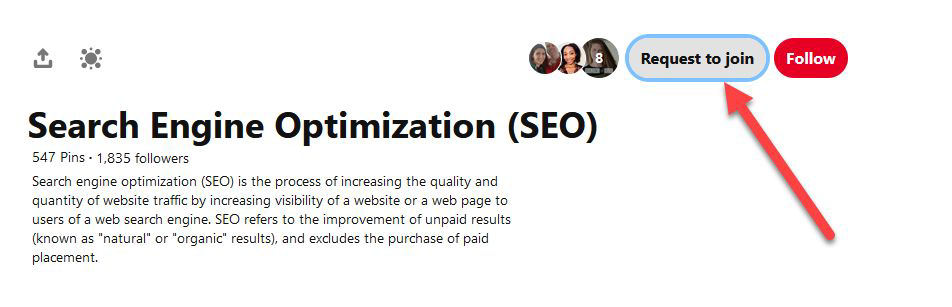
Once you’re accepted, you can contribute to other boards and extend your reach – all without spending a dime!
However, compared to Tailwind, Pingroupie may not show you lots of boards you can join for your niche. So, if you have the cash to spare, it’s wise to go with Tailwind sooner or later.
4. Courses or Memberships
Passive income doesn’t come any easier with online courses and memberships. The objective of both assets is to provide useful information that’s not readily available to the public.
This information is usually based on the experiences that help you become successful with your website.
Therefore, instead of just implementing the techniques and strategies on your business, you can turn them into a course and make money from them.
A course is a highly profitable venture if you play your cards right.
Compared to ebooks, you can command a much higher price for both because of the level of detail that they can find here.
That said, it’s highly recommended that you use paid tools to set up your online course. People are paying you money to deliver the goods to them, so you should reciprocate in kind by using the best tools available.
For starters, you need to determine which platform you must use for launching your course or membership site.
Thinkific proves to be the best choice because they have a free account that lets you create three courses for unlimited members. You can scale up to any of its paid plans if your course becomes a resounding success.

While building your course, you can pre-launch it by sending newsletters to your email list. You can give exclusive access to your course before it’s finished and at discounted prices for those interested.
You can even tap to your social media followers and seek help from influencers to expand your reach.
Doing so allows you to build buzz and anticipation for your upcoming events. To sweeten the deals, you can turn early adopters into affiliates so you can drive more sales to your course even before it’s launched.
After launching the course, you can drive even more sales to it by periodically releasing time-sensitive discount coupons.
Both features are available as part of Thinkific’s Basic Plan and above. The great thing about platforms like this is you can create a community for your course-takers to discuss your lessons and help each other.
You can even post messages to ask them questions on how to improve your course and what other topic you want them to discuss.
As a result, you can turn your course into a membership site.
You can command an even higher price for this because they get your lessons and a community of like-minded folks whom they
can turn into business partners.
5. Pixel Data
If you’re using Facebook Ads or Google Ads to drive more traffic to your site, then it makes perfect sense to use pixel data if you haven’t yet.
They track user activity on your website so you can remarket or retarget ads to them.
For example, if they purchased something on your site before leaving, they will see ads of your site on other websites or on Facebook enticing you to buy other goods.
The pixel data uses your last visit as touch point to draw you back again to the website.
The benefit of using pixel data is to lower the cost of paid ads. Instead of bidding for keywords to appear on top of SERPs, pixel data understands how your target audience interacts with your website.
From there, it will determine the type of ad that will show to him or her next time. To do this, you need to sign up to Facebook and create a data source where you can set up your pixel.
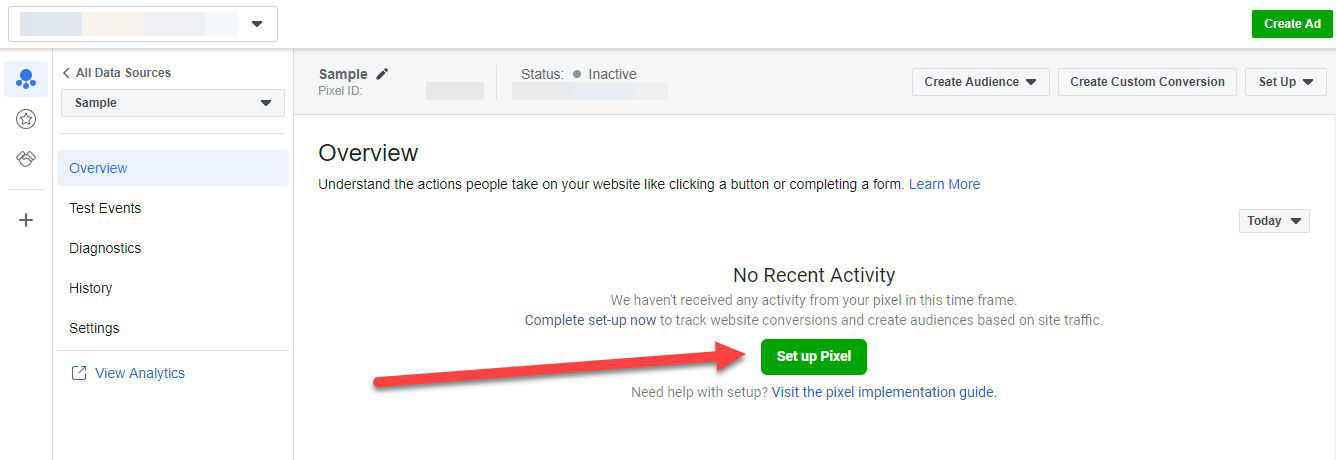
A window will pop up asking you how you plan on integrating the pixel. CMS users can connect Facebook with their site so they can integrate the code easily.
![]()
From here, you will be guided through the process of setting up your pixel and integrating them to your site.
Once the pixel on your site is tracking perfectly, you need to build ads based on the event you want to track.
For instance, visitors landed on a course sign-up page but didn’t join for a number of reasons. Maybe they were still weighing their opinions or are unsure of signing up.
The remarketing ads will then pop up whenever they browse on their Facebook feed to encourage them to join.
The same principle applies to Google Ads remarketing. You need to set up a pixel and install it on your site. Then you must create a remarketing audience for website visitors.
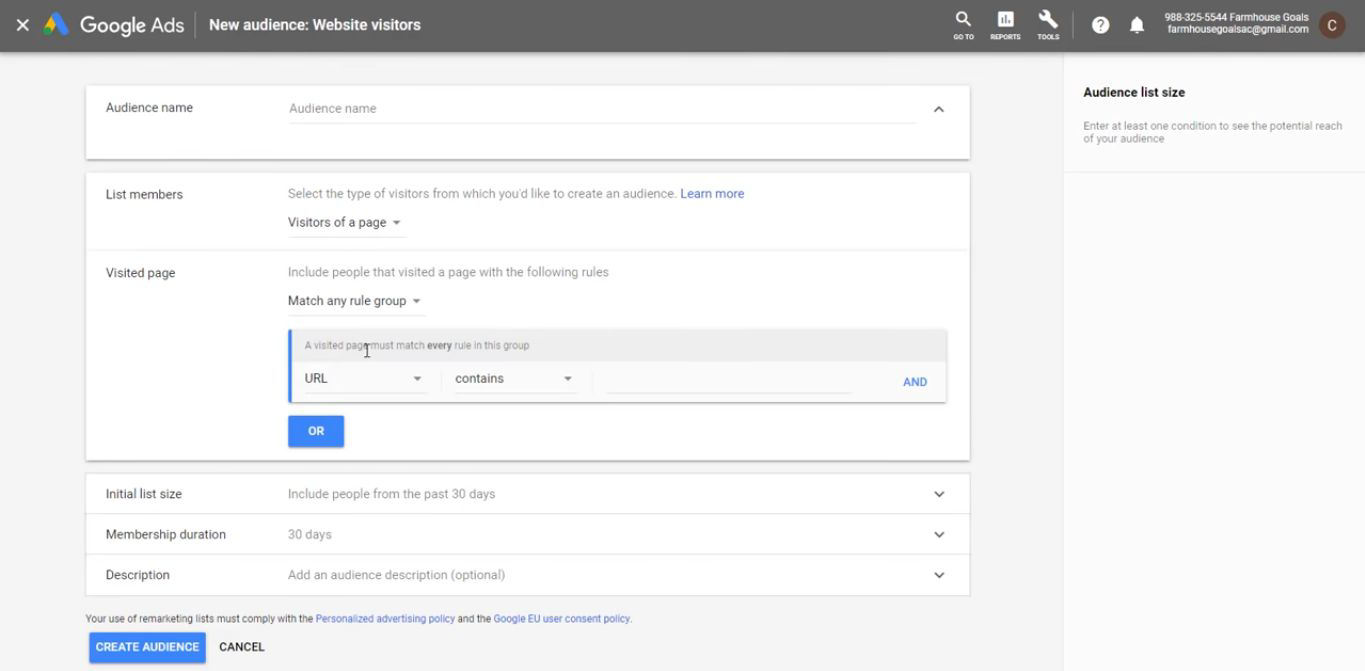
So, if people perform a specific event on one of your pages, the pixel will trigger the right display ads to show to your visitors.
This is unlike Facebook, where people can also see the ads from their Facebook feeds. Ideally, you want to use both pixel data to maximize your conversions and keep costs low. But you also have to understand the most potent traffic-generating channels you have.
If you’re getting tons of organic traffic, then it’s wise to start remarketing via display ads first and vice versa.

Check more articles:
4 Key Factors for Email Marketing Automation
8 Content Marketing Strategy : You should KNOW
How to Analyze Competitors Ad Campaigns
10 Best Email Marketing Course Online 2021
10 Best Digital Marketing Courses 2021 [ Updated ]
Conclusion
Small business owners have a lot to consider, but it’s critical to set aside some time to spread the word about your company’s website. As long as your website isn’t getting traffic, no one will know how wonderful your company or website is.
Consider Following a Course ?
With Lifetime Access ?
We have been the number 1# platform for delivering most demanding course. Becoming Lifetime Member , You will receive all the Premium content For FREE
")
Consider Following a Course ? With Lifetime Access ?
We have been the number 1# platform for delivering most demanding course. Becoming Lifetime Member , You will receive all the Premium content For FREE