

Once you’ve set up your PBNs, there is no way to go but up.
To complement your content creation campaigns, however, you can take other ways to growth-hack your PBNs to unleash its full potential.
In this post , we will check how you can use the domain’s existing content to your advantage as well as simple link building tactics to help get your site off the ground.
In doing the things below for your site, you are keeping your domain fresh for Google to index its content and rank it for their respective keywords.
Leveraging Old Posts
you can restore content with the help of Wayback Machine. By scraping the cached pages of aged domains, you can republish as if it never got deleted.
However, you don’t want to recreate all cached pages in an expired or aged domain. You only want to focus on recovering those with existing backlinks.
The fact that other sites linked to the pages of the aged domain means that people found value in them.
Therefore, it’s best to treat these pages as pillar posts in your PBNs. By relying on the power of the most linked pages of the domains, you can distribute the domain’s authority to the other pages of your site.
As a result, the new pages can rank faster on organic search.
Below are ways you can spread out the authority from these linked pages in your PBNs.
Internally link to relevant content
Once you’ve recreated the cached content with backlinks on your PBNs, you must next determine its target keyword.
The goal is to create supporting articles to these pillar posts. This way, you create semantically relevant content about the site’s niche. However, this only applies if the most linked articles of the aged domains are topics related to the niche.
For example, if the site is about camping, the content must be about tents, parks, and other related topics.
Through the creation of supporting articles, you are also creating topic clusters or reverse silos for your PBNs.
Here’s a visual representation of a reverse silo:
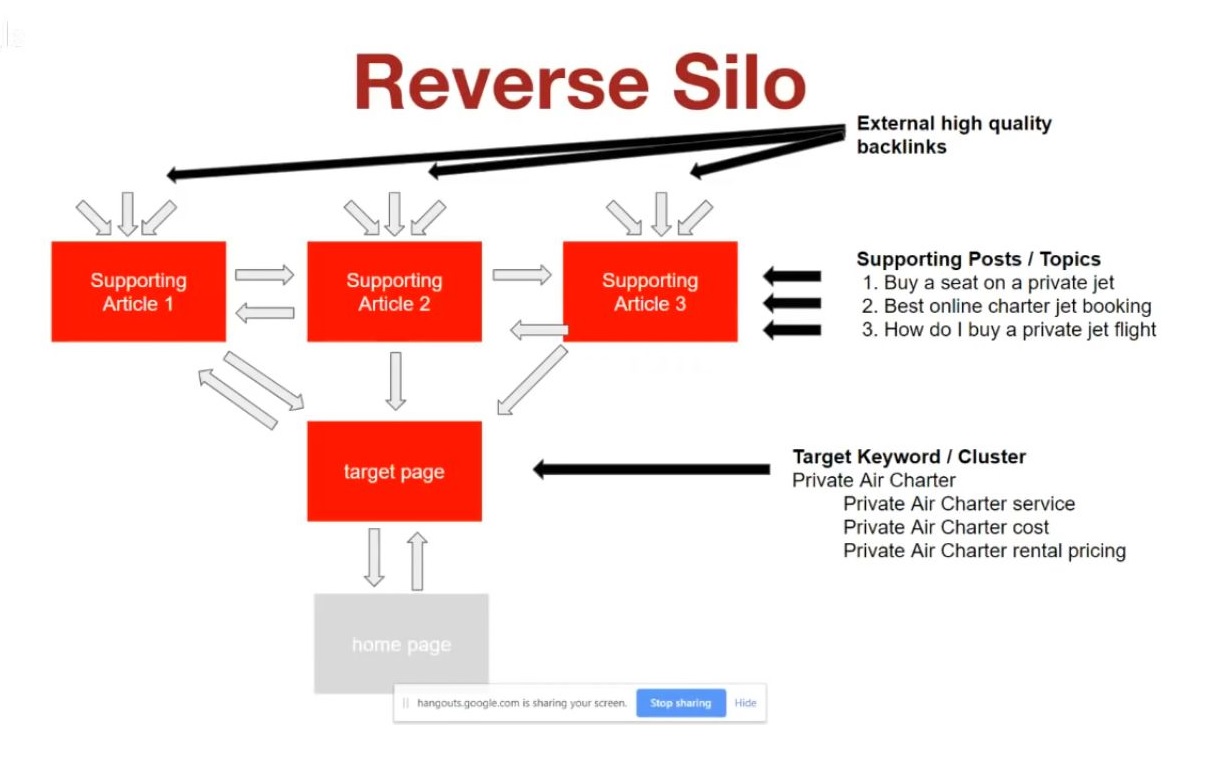
From the image above, the target page is the pillar post and the supporting articles link back to it and to each other.
However, the target page only links to one of the supporting articles. In this case, you will decide which among them should you link to.
The purpose of the internal linking structure is to help facilitate the circulation of the authority coming from the target page to the rest of the pages in the silo.
In doing so, you achieve things
create a topic cluster in your site that Google loves and elevate the target page and potentially help it rank for its target keyword And to do this, you need to determine what the target keyword of the pillar post is.
Most of the time, the keyword is the page’s URL, i.e. if the content is about the best car camping tent, then the URL would be “/best-car-camping-tent” or similar.
You can confirm this by looking at the page’s title or if it is mentioned multiple times in the content.
Once you’ve confirmed, the next thing to do is find the keywords you can use for its supporting articles.
Go to Ahrefs and enter the target keyword on the Keyword Explorer feature. Scroll down the Overview page to check the Questions column under the Keyword ideas by search volume section.
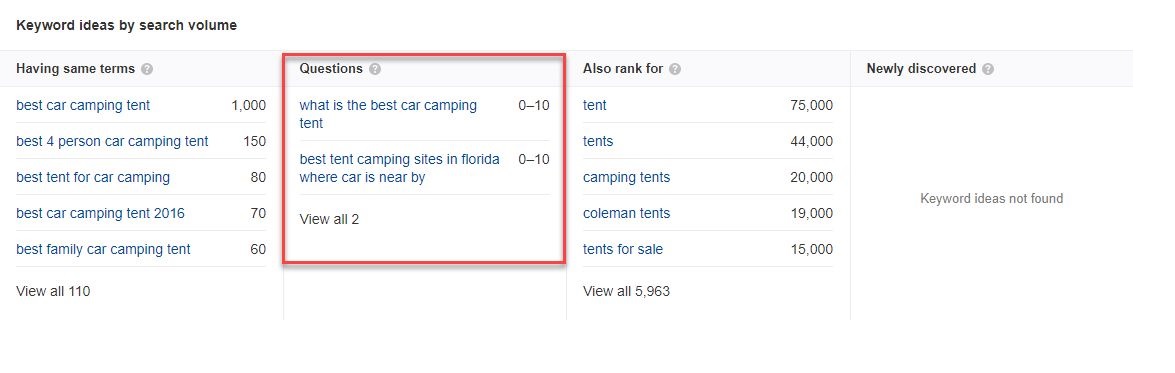
From the screenshot above, there are only two questions you can answer from the target keyword. You expand the list, you can tweak the keyword by removing or replacing words to make it broader.
For the keyword “car camping tent,” there are 17 question keywords you can use as supporting articles.
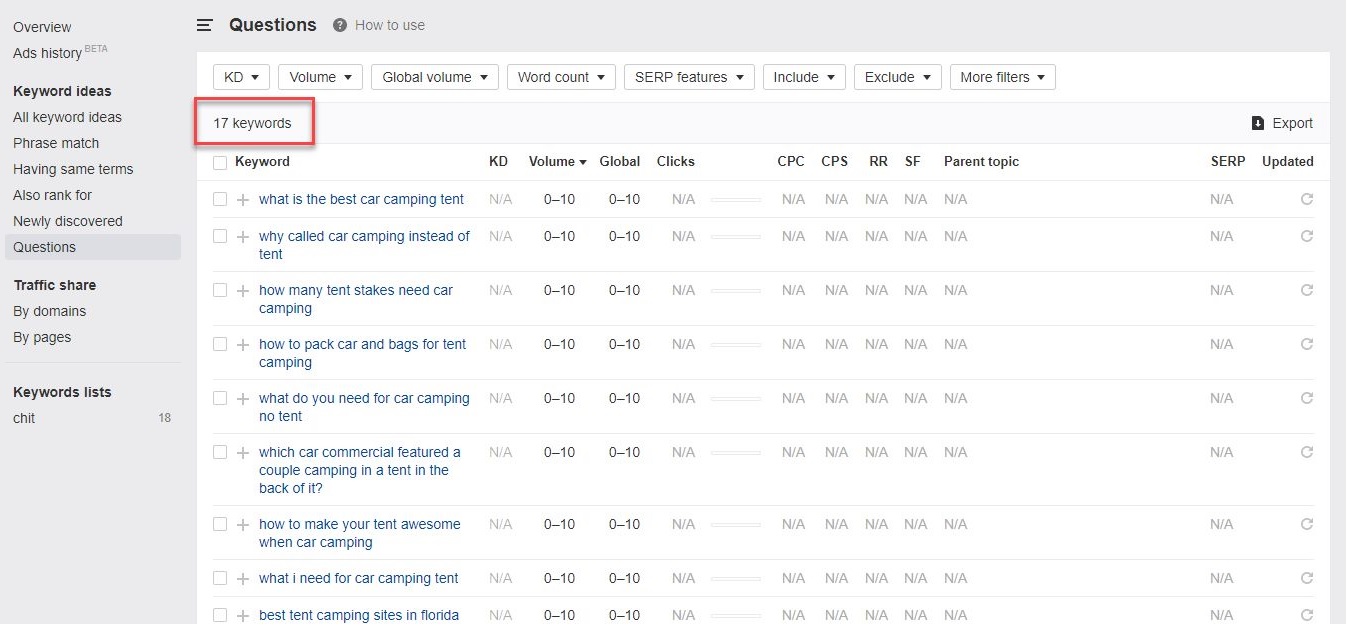
Under the Volume column of the Questions section, you can see that the keywords don’t have lots of monthly searches.
However, the goal here is to simply create a topically relevant silo to help increase the site’s authority in its target niche.
Therefore, you can proceed using the questions here as target keywords for the “best car camping tent.” You can use all 17 or how many you feel is necessary to complete the silo.
Just be wary of the linking structure as shown in the screenshot above.
For example, article 1 links to article 2 and back. Article 2 links to article 3 and back, but article 3 doesn’t link to article 1, and so on.
Do the same for the other pillar posts on your site. Once you’ve exhausted the silos, you can use the suggested keywords from Ahrefs to create new pillar posts or target pages to start new silos.
For example, if you want to find related keywords to “camping tent,” go to Keyword ideas > Having same terms from the Keyword Explorer page. Then filter the result to only show those with a KD between 0-5.
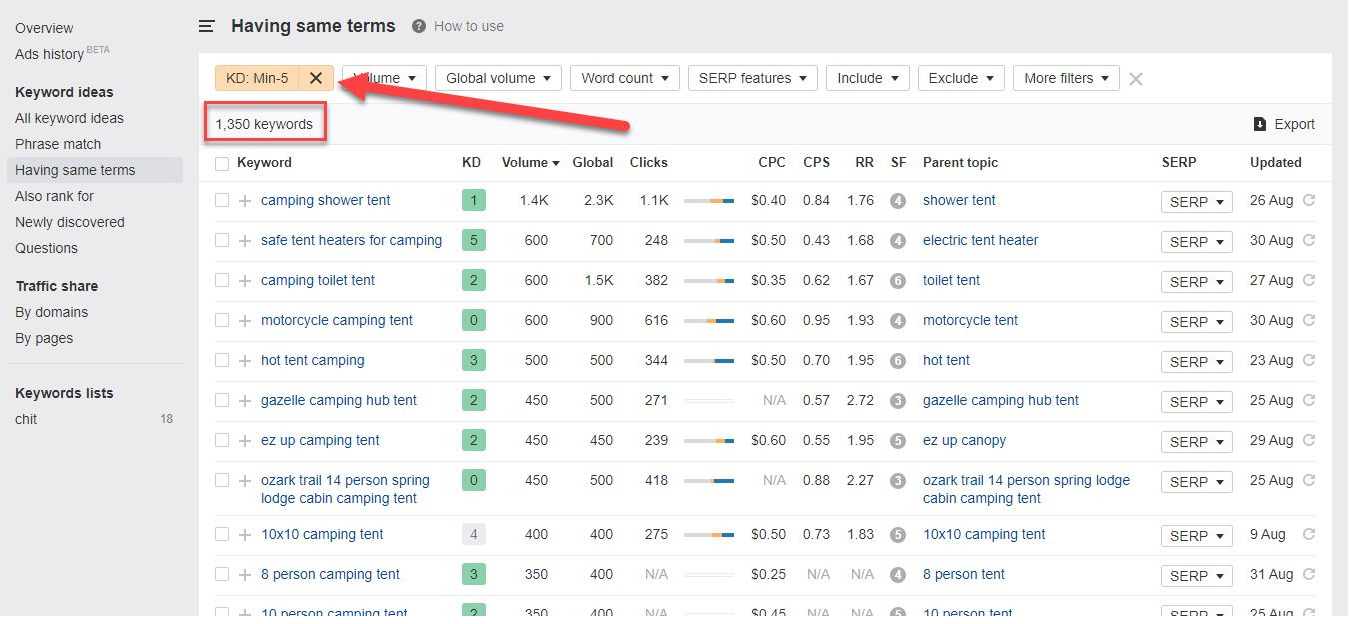
By doing so, you get to limit the resutls to keywords with the lowest competition. Optimizing for any of these keywords should give you a fighting chance to rank for each one, especially if you create supporting articles for each.
Once you’ve decided on a keyword for your target page, find Questions keywords to use for your supporting articles.
Just repeat the same process above to help you generate boundless content ideas for your site.

Reoptimize content if necessary
On top of the links the pages recovered from Wayback Machine have, the supporting pages linking to them should further improve their chances at ranking on organic search.
And if this happens, the next step you should do is rework the restored content and optimize them even further.
You should only do this assuming that you copied the same exact content from Wayback Machine.
Even if the page is found outside the second or third page of Google, it’s a sign that you should tweak the page to help it break to the first page of SERPs for its target keyword.
To do this, you need to use Surfer SEO’s Content Editor.
The tool breaks down for you the top-ranking pages for the keyword you entered. From there, you will see which pages to use as references for optimizing your content using the tool’s Content Score.
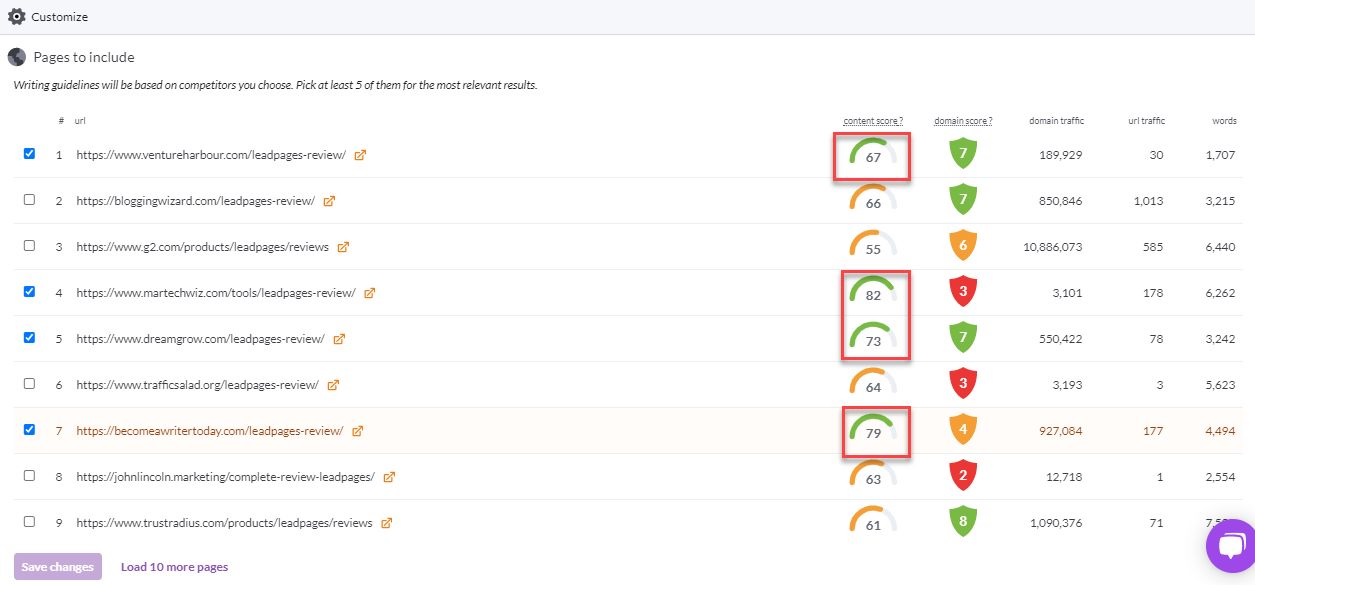
The score is determined based on the words and phrases the pages used in related to the keyword you entered, among other page factors.
The higher the Content Score of a page, the higher its relevance to the target keyword.
From here, all you need to do is write the content using the most common keywords featured in the editor.
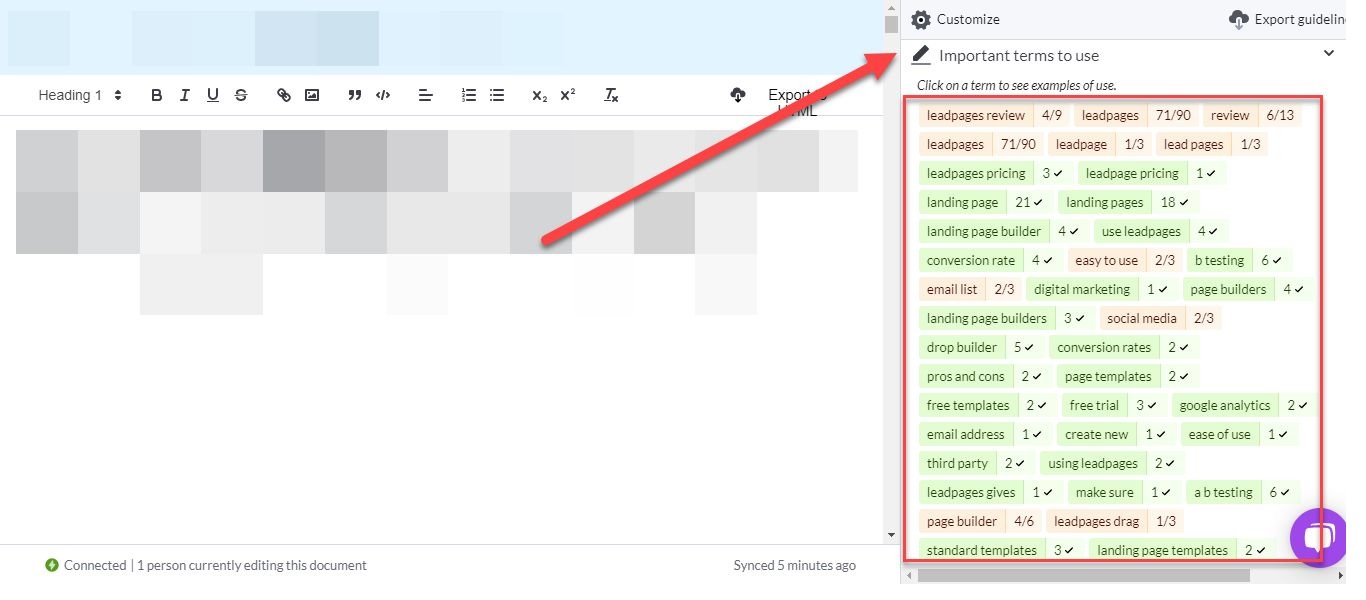
If you mentioned the words and phrases enough times in the article, they will appear in green.
If not, they will appear in red or light orange. This means you need to either mention them more times or remove some of them in the article.
Using the Content Editor, you will also see how many words, images, and headers you must use in the article.
Again, the goal of using this tool is to optimize your content for your target keyword in reference to the top-performing pages ranking for it. Therefore, the data you will see from the tool will depend on the keyword you entered.
That said, it’s best to only use Surfer SEO’s Content Editor once the pillar posts start ranking on SERPs. Using the tool when optimizing the pages you want to recover may only be in vain especially if they end up not ranking at all.
5 Simple Link Building Tactics
Link building strategies are mostly reserved for your money sites. That’s why in the first place: to learn how to build a Google-proof PBN you’ll use for link building.
However, if you’re going to build links to your money sites using PBNs, how will you build links to your PBNs?
Thankfully, link building for PBNs doesn’t have to be as complex as the campaigns for your money sites.
The idea behind building links for PBNs is to sustain their freshness in the eyes of Google. Since you bought the aged domains due to their existing authority, there is no need to launch link building campaigns to make them even more authoritative.
Instead, you can go with simple tactics of building links to your PBNs. They’re not on the level of guest posting, blogger outreach, and similar that require monitoring and critical thinking.
As a result, they’ll be much easier to execute. You can then hand off the task to your VA without having to worry about the quality of the links.
At the very least, however, make sure that the links aren’t spammy and toxic.
The links you’ll be building here should complement the content you’re creating for all your PBNs. This way, Google will see your sites and treat them just like any natural site they encounter without detecting any red flags.
Below are link building techniques you can do for your blogs:
1. Blog commenting
Links on blog comments don’t hold as much value as before. Not to mention, getting your comments approved by site owners has gotten much more difficult than before due to the rampant spamming that takes place in this space.
However, when done correctly, blog commenting helps spread the word about your blog and its content.
This is especially true if the comments you’ll be leaving move the discussion forward and provide value to the site owner and visitors.
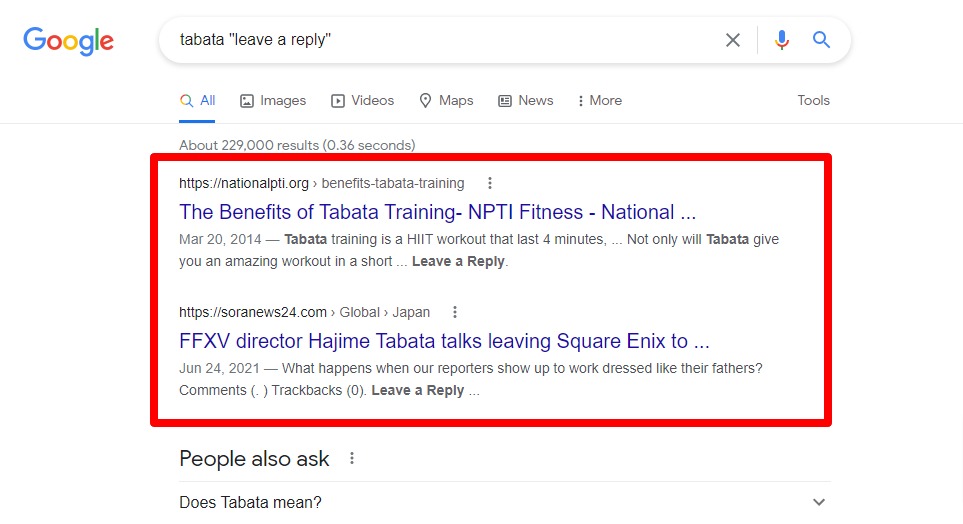
To do this, you must learn where to find the best blogs to comment on. Go to Google and enter [keyword] “leave a comment” or [keyword] “leave a reply.” Replace [keyword] with your niche or any of the keywords you used in your content.
The results will show you pages related to your niche or keyword where you can leave comments on.
Click on any of the results here to see if you can leave comments by scrolling at the bottom of the post.
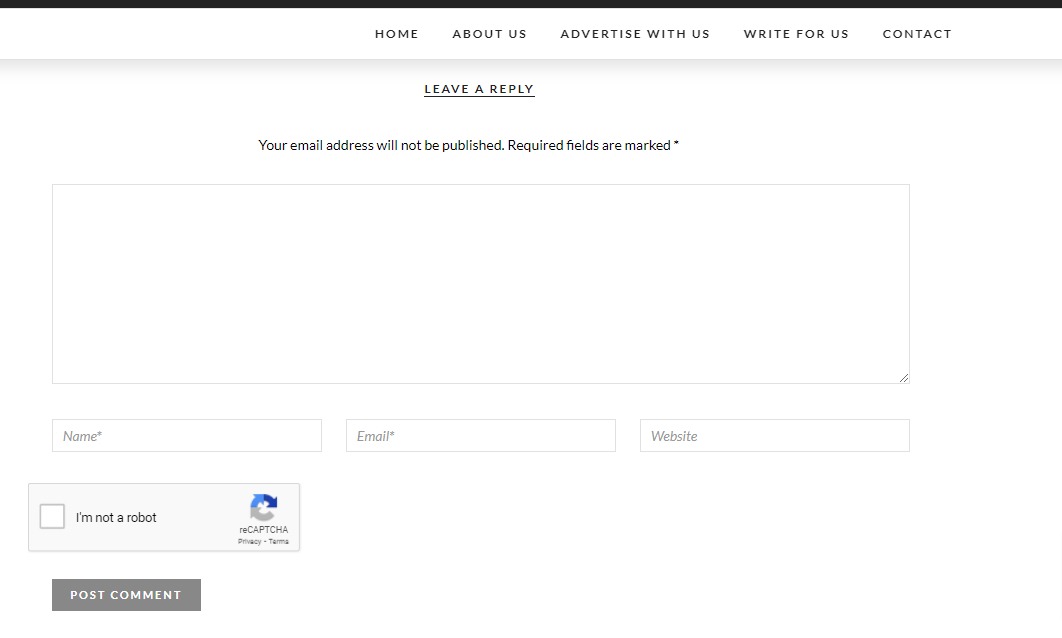
While you can leave a comment on this blog, it doesn’t necessarily mean that you have to.
Before leaving a comment on a domain, you need to check the blog and see if there are comments published on their other posts.
The screenshot above is from a different blog. So, the fact that the previous blog doesn’t have comments on its posts is a sign that they don’t approve comments or they haven’t found comments that they should include in their posts.
Nonetheless, prioritize blogs that have lots of approved comments. Leaving comments on these blogs are much easier given their track record.
Once you’re done with these blogs, move on to blogs that don’t have as many comments.
When leaving comments, you will normally see the four text boxes that you can fill out: name, email, website, and comment. Only the website is optional among the four.
However, for the purpose of building links, you need to enter your PBN URL here. As for the name and email, enter the same details you used for the site’s WHOIS information.
For the actual comments, below are rules of thumb you must follow:
- Never leave one-liner comments like “thank you for the information,” “great post,” or something similar. They don’t add anything to the content and are useless as a result.
- You can thank the author for the article s/he wrote, but you need to explain why. Maybe there’s a detail in the article you didn’t know before that the author shed light on. Talk about that in your comment and relate it to a personal experience if possible.
- Check the kinds of comments the site owners approve on their blogs and just follow the same format and tone. In other words, do what works.
- If something isn’t clear in the article, ask the question in your comment? Questions as comments have a good chance of getting approved because this gives an opportunity for the author to make the article much more comprehensive by supplying his/her answer.
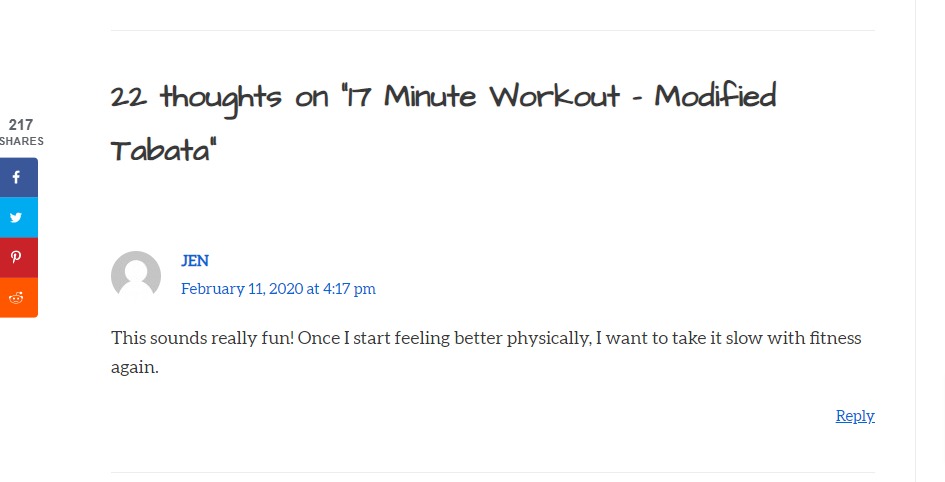
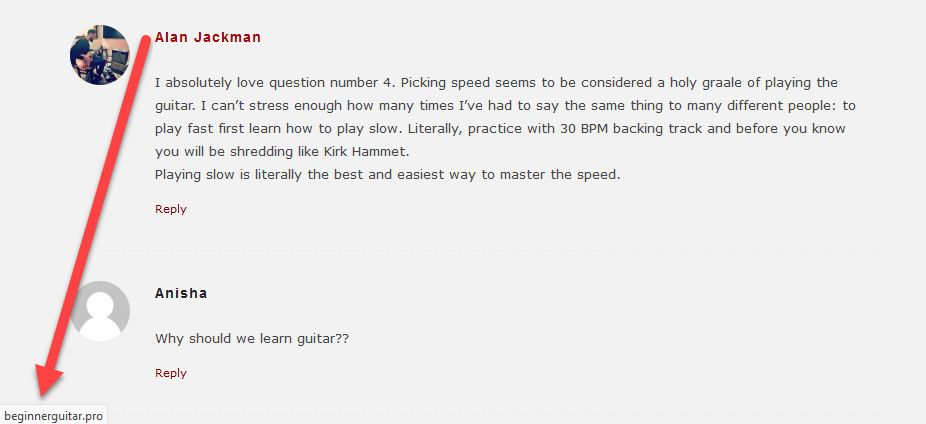
Here’s an example of a good comment from an electric guitar website with a post about the most common questions from beginners:

The comment not only reaffirms the content but also throws in additional tips to help readers learn how to play the guitar correctly.
If your comments get approved, then you will see them in their respective comments sections. More importantly, the website will be linked from your name as anchor text.
This is how blog commenting usually works. It’s possible to leave a link to your blog post on the comment body if it is relevant to your comment and the blog’s article.
However, the chances of approval are lower because site owners are hesitant in getting links approved in the comment body.
When doing blog comments, quantity wins. Because even if you put in a lot of effort on your comment, the link from it will still have the same power compared to a comment with just two sentences (assuming both comments are from the same domain).
Therefore, leave around 50 comments a week for your PBNs. Assume that approximately 20% of all your comments will be approved.
In this case, you need to delegate this task to a VA who will be responsible in managing the comments and keeping track of the domains s/he has left comments in.
2. Directory submissions
Submitting your sites on different online directories was once a link building staple from years past. Nowadays, unless the online directly is hyper-targeted and relevant to your niche, this tactic doesn’t bring as much power as before to one’s link profile.
However, as mentioned above, Your goal of building links is to keep your site fresh and relevant to search engines.
In this case, directory links ought to get the job done. To do this, go to Google and use any of the following search queries:
- [keyword] directory “add your site”
- [keyword] directory “add your URL”
- [keyword] directory “submit your site”
- [keyword] directory “submit your URL”
Replace [keyword] with your niche or a keyword from one of your posts.
Here’s a screenshot of Google using the search query guitar directory “add your site”
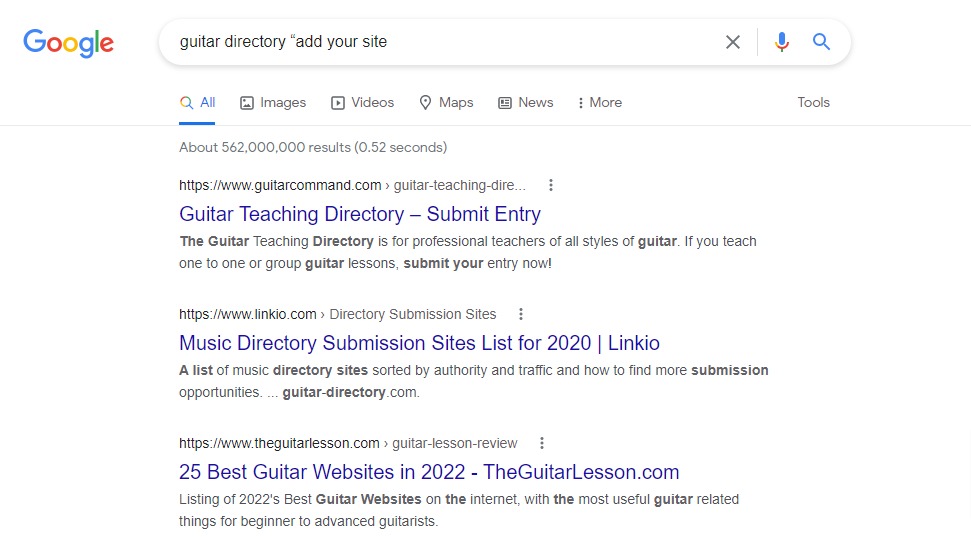
Click on any of the results to find sites where you can submit your site as part of their directory:
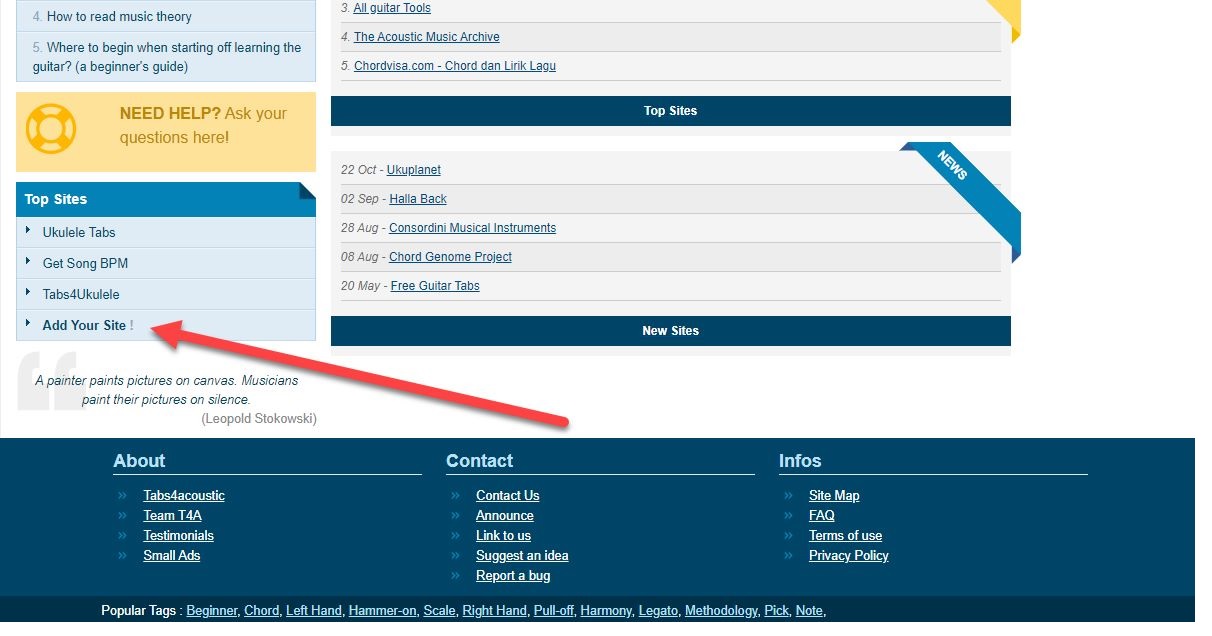
Here’s what you can expect to see when clicking on the link:
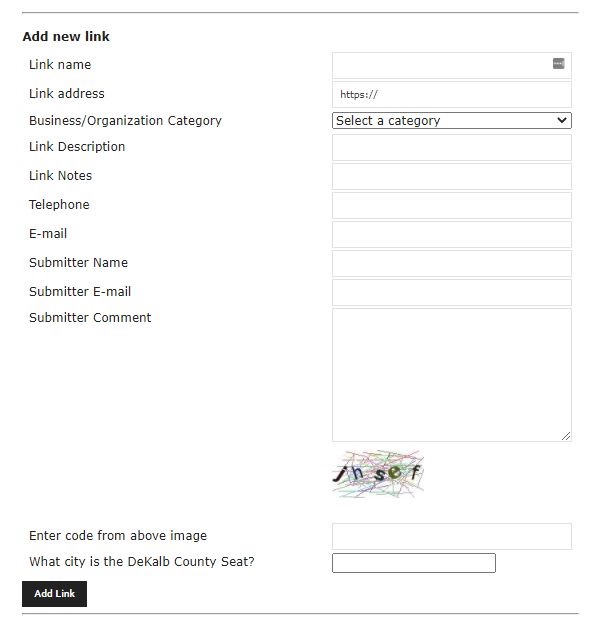
Just fill out the form with information about your site.
Some directory sites only accept your submission if you can link back to their site in your homepage:
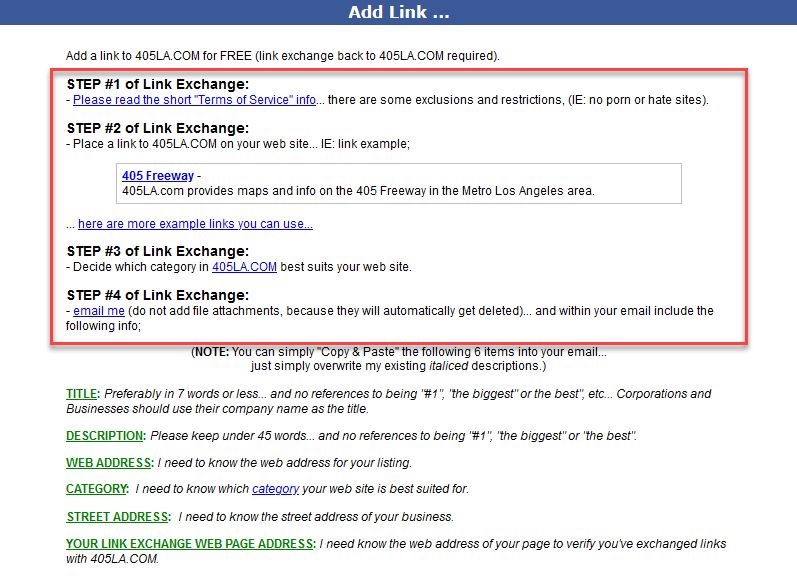
Instead of exchanging links with these sites, best to avoid them altogether. You don’t want to get entangled with linking to directory sites since they’re most likely not related to your site’s niche.
There are also directory sites asking for payment before they list down your site. Again, you want to keep your process of link building simple as possible.
That means keeping your costs low and getting lots of reasonable links pointing to your site.
That being said, avoid directory sites that make things much more complicated than you need them to be such as link exchanges, asking for payment, and others.
Before you proceed, therefore, identify directory sites that just let you submit your site and nothing more.
The good thing here is you can use the same details about your site that you submitted on other directory sites. Once you’ve prepared them, you just need to copy and paste them on the form of each directory site.
Once they’re in the hands of the site owner, it might take a while before they add your link into their directory. The period for waiting when your site will be included depends on the directory site, which is difficult to determine.
That said, submit as many as you can in a week or month. Similar to blog comment, send around 50 a month for starters.
From there, gauge how many of your submissions get accepted. You don’t want to spend too much time on a tactic that yields no results.
3. Social Profiles
Links from social media sites like Facebook, Twitter, and others don’t mean much as far as link building is concerned.
As a link signal, however, they help diversify the kinds of links pointing to your site. In the process, they make your link profile much more natural and organic to Google.
The goal is to sign up for different social media accounts and enter a link to your site in the profile.
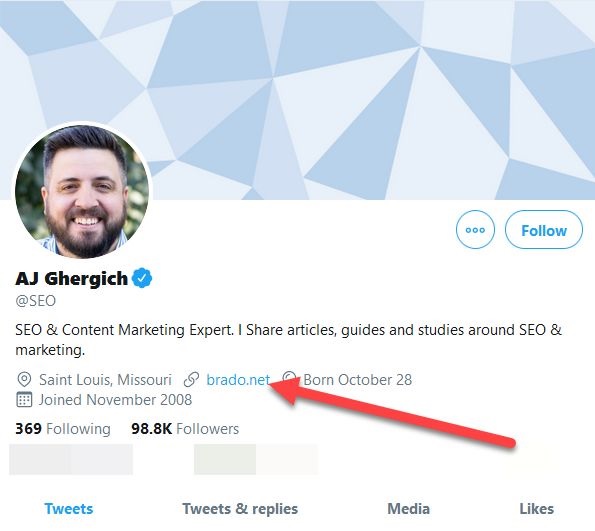
Here’s an example on how it looks like on Twitter:
Here’s how it looks like on Facebook Pages:
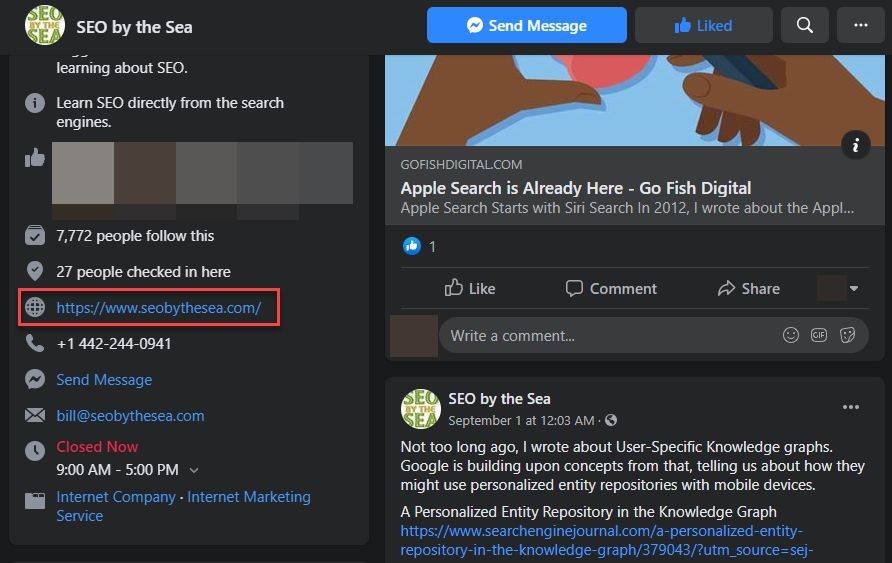
Each social media site allows you to feature a link to your site in some shape or form. It’s up to you on which platforms you want to sign up to and how you can include your PBNs in your profiles.
From the examples above, these are actual people and brands that constantly use social media to connect with their audience. But while you probably won’t use social media for this purpose, the point here is to utilize social media as a way to treat your sites as if they’re brands that you want to constantly.
By presenting it as such, Google will also see it that way as a result.
What you need to know here are social media sites where you can sign up to. While you want to leverage the popular sites out there, you may also want to cover other non-popular sites to diversify your social signals.
To do this, go to NameCh_k and enter the name of your site on the search bar.
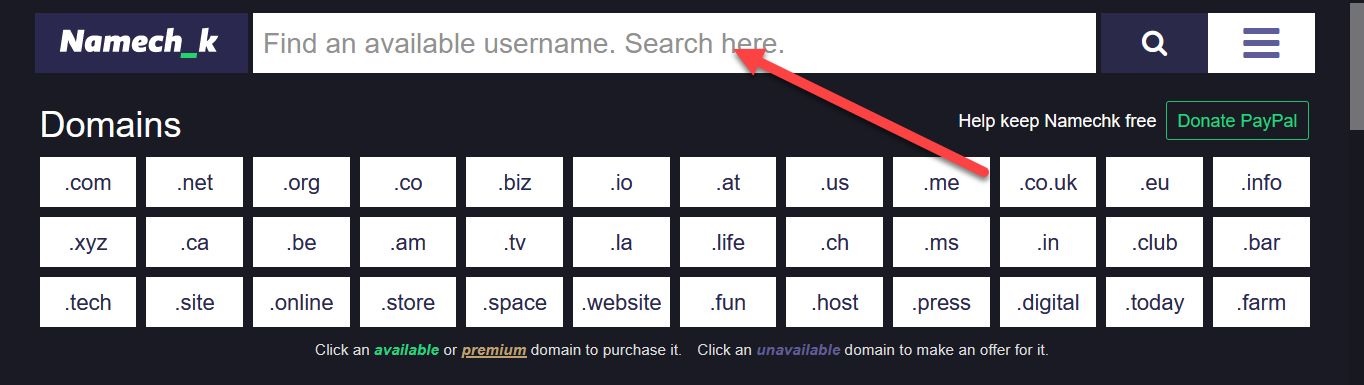
What the tool will do is cross-reference your username across different social sites and see if somebody already registered for it.
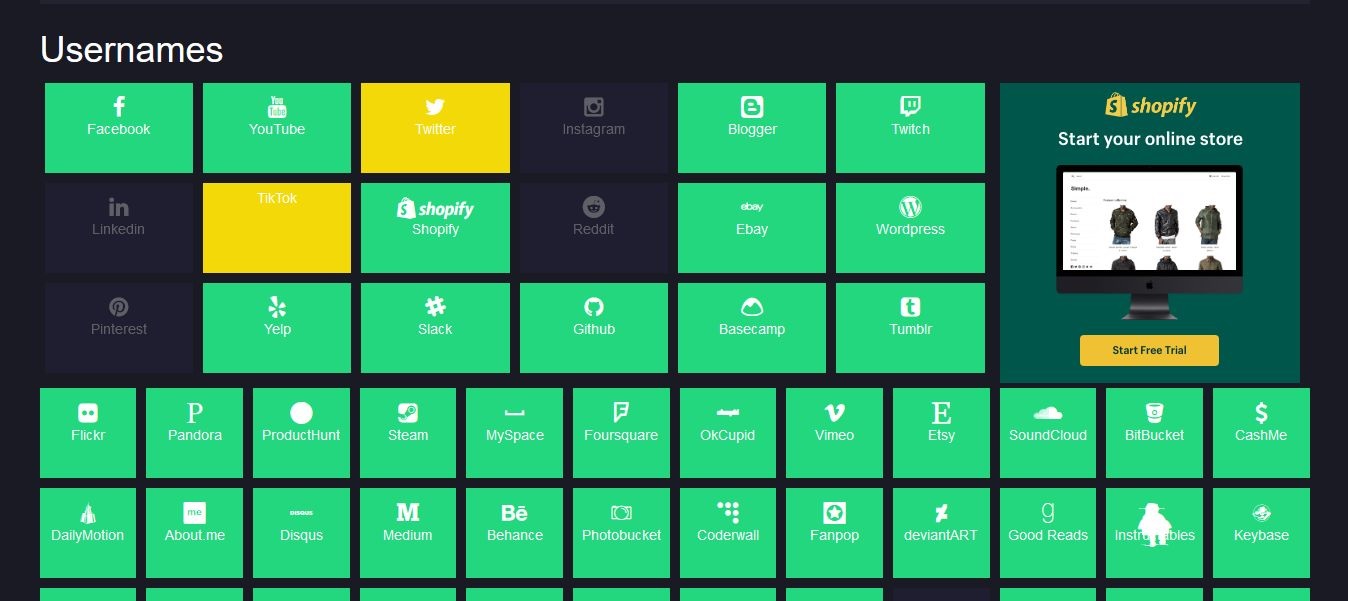
For sites in green, you can sign up to those sites using the username you entered above. For those in different colors like yellow, hover over them and see what the problem is.
From here, you should have a list of sites where you can sign up with a link to your PBN on the profile.
At the same time, you can’t just sign up, leave your link on your profile, and leave. As much as possible, find a way on how you can leverage the platform by creating content on it.
For instance, if you were to sign up for a Youtube account, you must figure out how you can upload a few videos to at least justify why you created an account..
Signing up for the account shouldn’t take long, but the time for creating content for the different sites will depend on the kind of content each site demands.
At the very least, however, sign up to sites that you feel you can create content for then worry about those later.
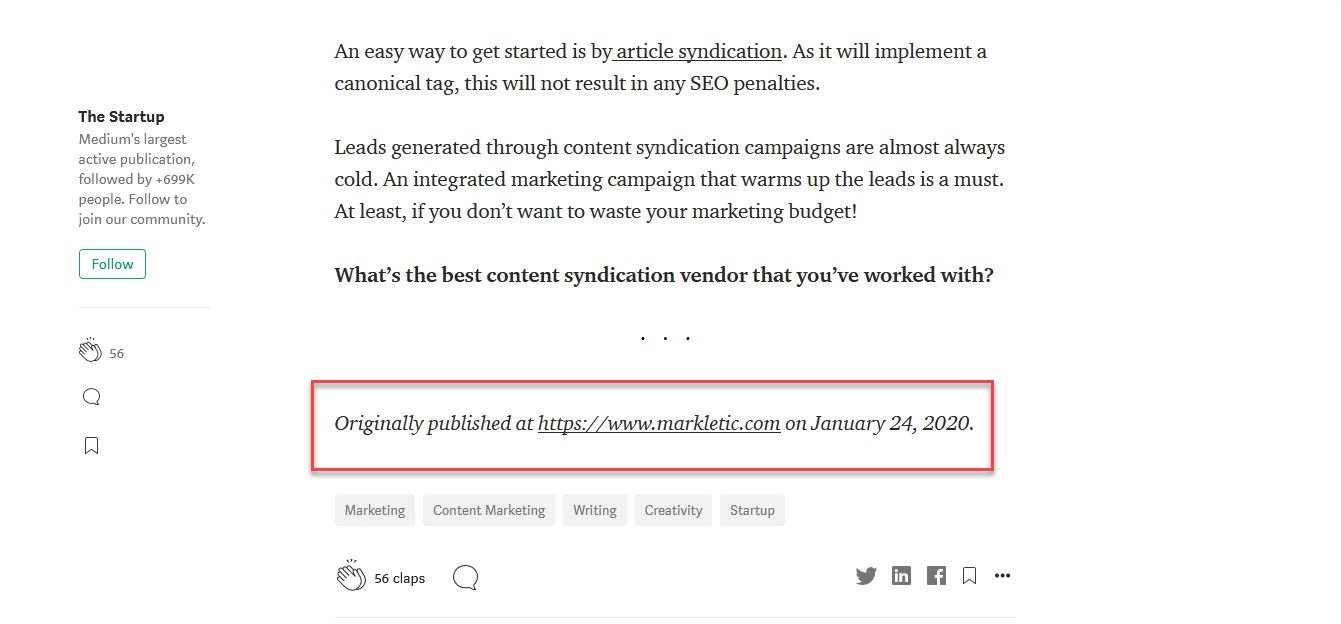
4. Content syndication
This process refers to getting your content republished on other sites with your permission.
In the case of building links, you can copy and paste the content on different platforms and link back to the post where it was originally published.
Here’s how it would look like when content is syndicated on Medium:
Another great thing about content syndication has nothing to do with link building and more about building an audience.
Again, it’s all about creating a natural-looking site for Google – you want to present your PBN akin to a brand.
Aside from optimizing it for search engines, you also want to tap into different avenues where you can attract and build an audience, just like any regular site would do.
Therefore, by syndicating your content, you broaden your online footprint and make it easier for people to find your site.
However, keep in mind that, just because you syndicated your site, you’re automatically going to attract hundreds of visitors to your PBN.
In time, you can get to this point. But right now, you’re focused on making your site more natural-looking by creating more links pointing to it.
Below is a partial list of sites where you can create an account and republish your content on these sites, most of which are web 2.0 sites:
- WordPress.com
- Tumblr
- Blogger
- Wix
- Weebly
- Jimdo
- Medium
The sites listed above are free – all you must do is sign up using the respective avatar of your PBN and design the site.
When setting up these sites, make sure to make it look legitimate and non-spammy. That could mean adding a contact form, creating an About page, and others.
Once done, you can syndicate the posts from your PBN one by one.
Note: To be clear, each web 2.0 site must only attribute to a PBN. That means you can syndicate content from multiple PBNs in a single web 2.0 site. These serve as online footprints which could trace back to you as the owner.
5. Infographics
Content repurposing is a great way to create content on your site without having to come up with new topics and ideas. Just take an existing blog post and convert it into a diferent format like video or audio (for podcasts).
However, for building links, turning written content into infographics is one of the better ways of leveraging content repurposing.
Compared to articles, data and insights found in infographics is much easier to process.
This quality makes infographics shared on social media and, most importantly, linked on other sites.
Keep in line with your simple link building campaign, you don’t have to hire a professional designer to recreate the infographic for you. All you need is a Canva account (even the free one) or another tool that allows you to create infographics.
The good thing about Canva is the number of infographic templates to choose from. This way, you don’t have to start from scratch.
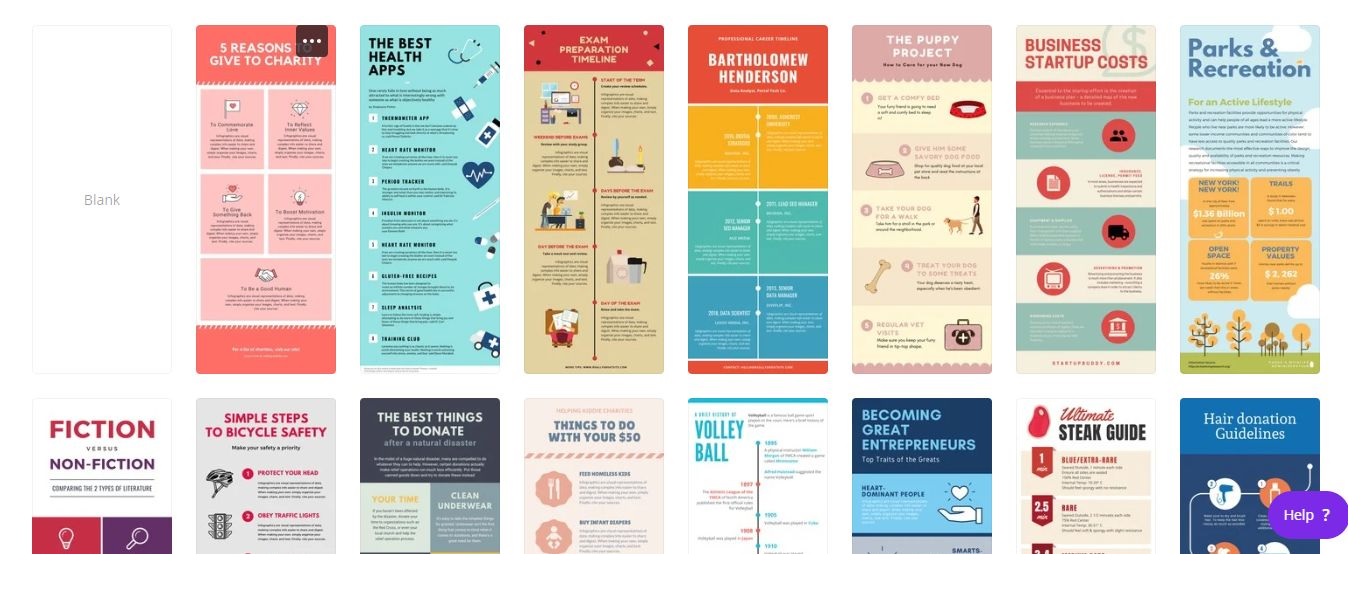
After choosing the template, simply replace the dummy text with the ones from your blog post.
You may need to edit the text a bit to fit the format of the infographic. But you’re essentially just copying and pasting the blog post onto the infographic file.
Once you have created the infographic, include it in the article source.
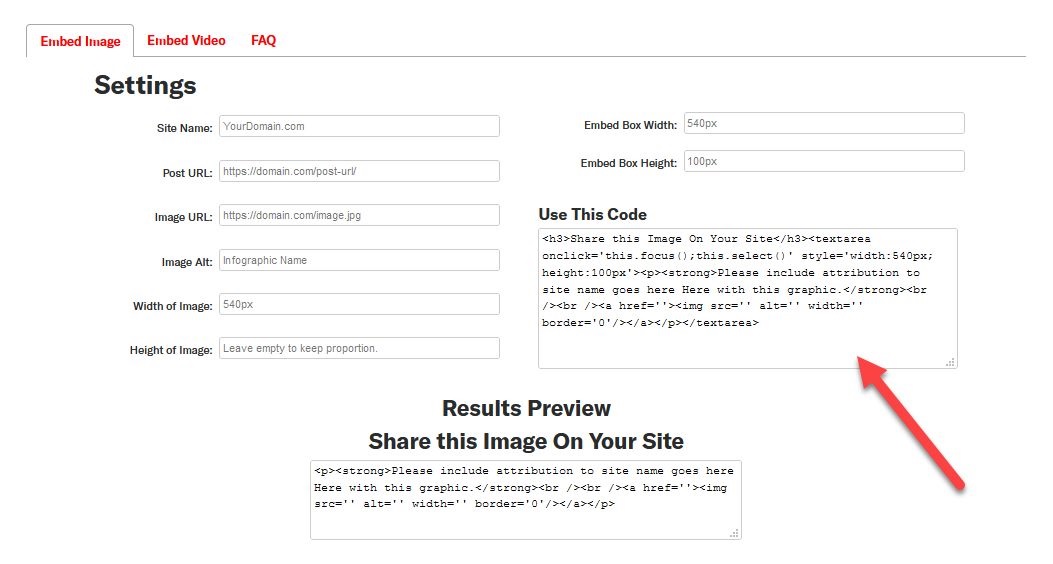
Next, you may want to include an embed code below the infographic. This makes copying and pasting the image on other websites much easier since they don’t have to save the image to their media folder.
More importantly, the code automatically includes a link back to the post. Therefore, your site will receive a backlink everytime someone will use the code.
Go to Siege Media Embed Code Generator and fill in the blanks to create the code you need to feature below the infographic:
Finally, you must submit your infographics to sites that accept and publish visual content.
To save you the time and trouble, here’s a list of sites from 99Signals where you can submit infographics.
The list is regularly updated so you can expect to see other sites soon. Similar to every submission site out there, getting your infographics featured on the site depends on the site owner and whether they see value in them.
Therefore, there’s a chance that your submissions will get rejected.
Also, it could take time before the editors get hold of your infographics and review them assuming that lots of users are submitting their content as well.
Regardless, submit to as many sites as possible to increase your chances of getting your content published and getting a link from each.
You can search for other sites that accept infographics using these search queries on Google:
- [keyword] “submit infographics”
- [keyword] “submit an infographic”
- [keyword] “submit your infographics”
Replace [keyword] with your niche.
Check more Articles:
Beginner Guide To PBN : Everything You Need To KNOW
How To Build A Web 2.0 Private Blog Network
How To Build A PBN (Private Blog Network) In 2022
How To Sell Backlinks : Everything You Need To Know ( 100% White Hat )
Conclusion: Diversify Your Tactics!
Using the techniques featured above should give your PBNs an edge. Not only will they end up looking much more natural than non-PBN sites but you also keep them relevant in the eyes of Google.
By regularly publishing posts and acquiring links for your PBNs, expect the links coming to be much more potent compared to your standard PBN.
For instance, let’s say you have three PBNs that you want to create content and build links to using the tactics above.
we advise against using the same tactics on the three sites. The reason is because, even though the content and links won’t be the same, the tactics all three sites are using would leave a pattern that could be akin to a footprint.
Either people might catch on to this and report your sites to Google or the search engine site itself will find out.
Again, you need to ensure that you’ll be using different variations of the tactics to fully cover your tracks.
Consider Following a Course ?
With Lifetime Access ?
We have been the number 1# platform for delivering most demanding course. Becoming Lifetime Member , You will receive all the Premium content For FREE
")
Consider Following a Course ? With Lifetime Access ?
We have been the number 1# platform for delivering most demanding course. Becoming Lifetime Member , You will receive all the Premium content For FREE